Apptoto Reminders
Table of Contents
- What are Reminders?
- User Interface
- How to Make New Reminders
- How to Edit Reminders
- How to Create Rules
- How to Edit Rules
- How to Associate Reminders with Rules
- Advanced Settings
What are Reminders?
Apptoto provides reminder functionality through Auto Messages. These are SMS (text) messages, emails, or voice calls that Apptoto automatically sends to participants of an event at predetermined times. Any number of Auto Messages can be sent out, but note that each Auto Message consumes one (1) account message credit.
There are three types of Auto Messages in Apptoto:
- Booking/Initial - sent at some time after the participant books an appointment
- Reminder - sent at some time before the appointment occurs
- Followup - sent at some time after the appointment is completed
Rules can be defined for reminders. These allow certain reminders to be sent out when specific content is included in an appointment. For instance, we can define a custom data type in an event as follows:
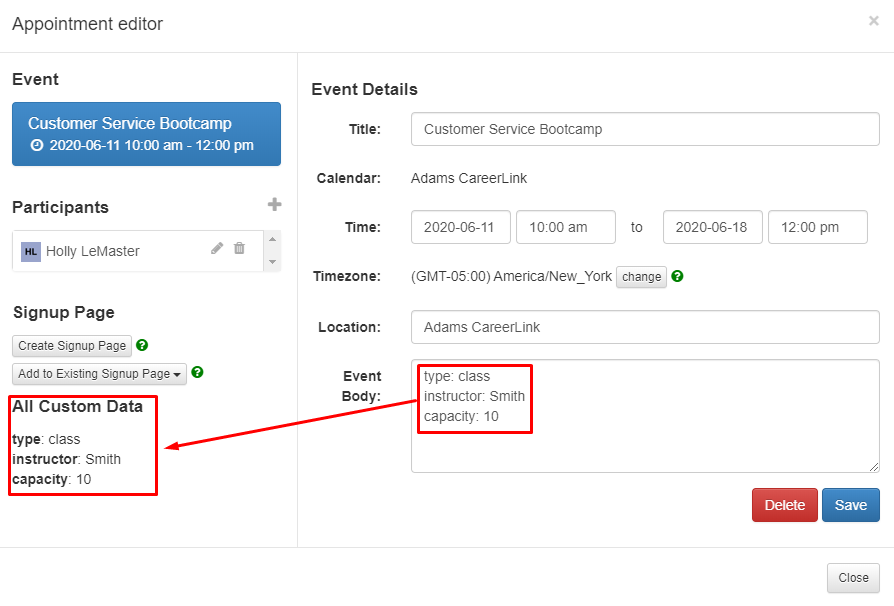
Then, we can create reminders using Rules that are sent only when that appointment contains the type: class data field.
User Interface
Auto Messages and Rules Interface
Below is the interface of the Auto Messages page.
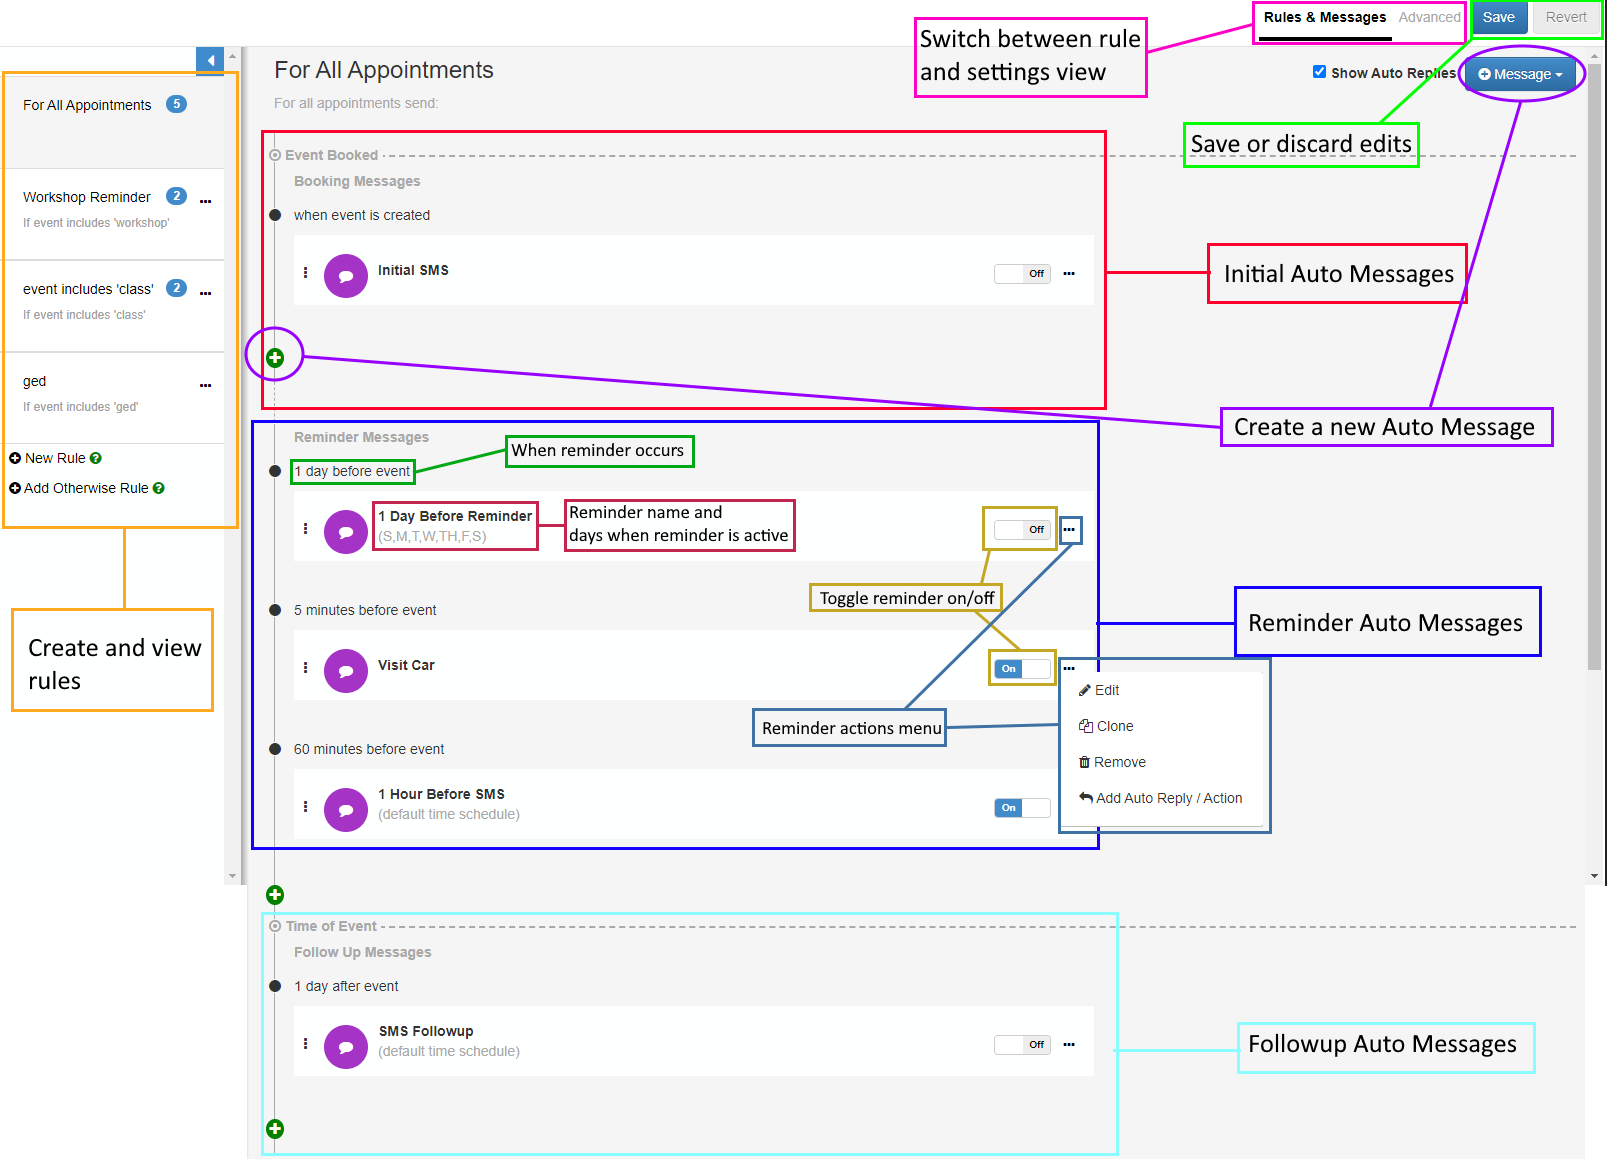
Let’s go over each section in the image above.
- Switch between rule and settings view - allows switching between Rules and Messages view and the Advanced Settings view. In Advanced Settings, you can adjust options pertaining to message delivery.
- Save or discard edits - the Save button saves edits to Auto Messages, while Revert discards any changes.
- Create new Auto Message - using either button, you can create a new Auto Message of any type. This opens the Auto Message Editor.
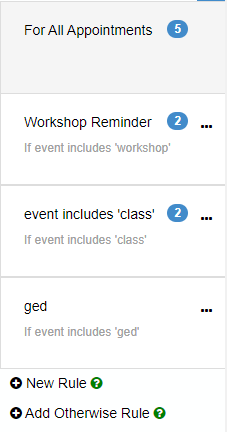
- Create and view rules - created rules appear here. For each rule, the logical statement used to filter events can be seen directly below the rule’s title. New rules can also be added by clicking New Rule.
- Initial Auto Messages - Auto Message reminders sent after a client has booked or been assigned to an appointment.
- Reminder Auto Messages - Auto Message reminders sent before an appointment occurs.
- When reminder occurs - the time interval selected for the Auto Message
- Reminder name and days when reminder is active - displays the name given to the Auto Message and the days the reminder will be sent out.
- Toggle reminder on/off - toggles whether a reminder will send. An off setting will prevent that particular Auto-Message from sending.
- Reminder Actions Menu - allows quick access to functions for Auto Messages. This includes editing, cloning (copying), deletion, and adding a new Auto Message directly below the selected message.
- Followup Auto Messages - Auto Message reminders sent after an appointment has ended.
Message Editor
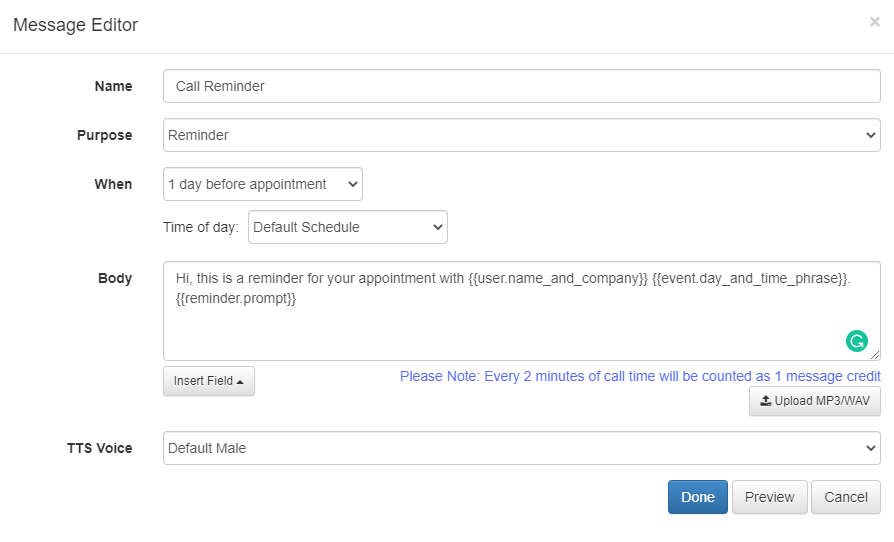
The message editor is where all Auto Messages are configured. Auto Messages require the following data:
- Name - a descriptive name for the reminder
- Purpose - whether the reminder is Booking/Initial, Reminder, or Followup
- When - time interval when reminder should be sent
- Time of Day - this determines when Auto Messages are allowed to be sent. This should always be set to Any or a Custom Schedule that encompasses the entire day. Auto Messages will NOT send outside of hours specified.
- Body - the message contents. This can include text and Fields. Fields allow you to populate data from the appointment, such as the time of day or participant name.

You can insert Fields in your message body using the Insert Field button. To add a field, simply select the category you’d like, and click the desired field value to insert it into your message.
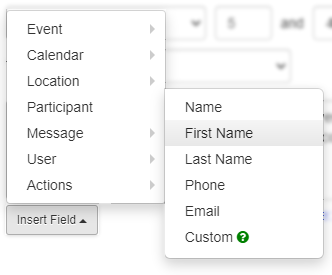
Fields always appear in your message body surrounded by curly braces. For example: {{ participant.email }} represents the attendee’s email address.

How to Make New Reminders
SMS Reminder
SMS reminders are text messages that are sent to appointment attendee’s phone numbers. Attendees can respond to these messages to preform actions (confirm/reschedule/cancel appointments, for example) or communicate with relevant staff.
-
Click one of the New Message buttons and click Add SMS.
-
Fill out the information about your reminder:
-
Name - enter a descriptive name for the reminder.
-
Purpose - select whether this reminder should be Booking/Initial, Reminder, or Followup.
-
When - enter the time before or after the appointment that this reminder should send.
- IMPORTANT - make sure the Time of day is set to either Any or a Custom Schedule encompassing the entire day.

-
Body - enter the contents of the message. Fields can be added with the Insert Field button.
-
-
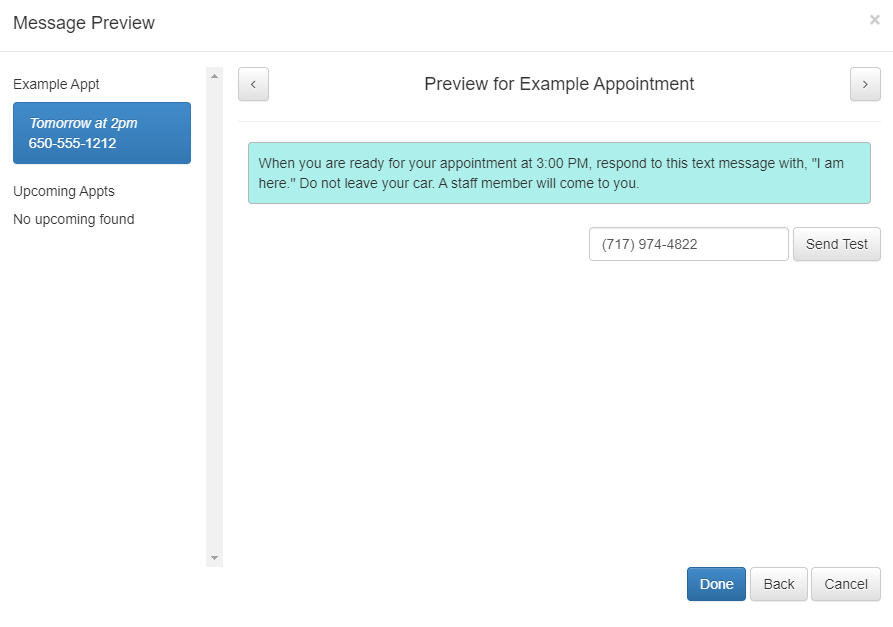
You can click Preview to see what your message will look like to the client.
-
Click Done to save your Auto Message.
Email Reminder
Email reminders are email messages sent to participants’ email addresses.
-
Click one of the New Message buttons and select Add Email.

-
Fill out the information about your email reminder:
-
Name - enter a descriptive name for the reminder.
-
Purpose - select whether this reminder should be Booking/Initial, Reminder, or Followup.
-
When - enter the time before or after the appointment that this reminder should send.
- IMPORTANT - make sure the Time of day is set to either Any or a Custom Schedule encompassing the entire day.
-
Subject - enter the subject line of the email message.
-
Body - enter the contents of your email message. You can use the WYSIWYG editor to format text inside your message. Fields can also be inserted using the Insert Field button.
-
-
Click Preview to view how your message will appear to the recipient.
-
Click Done to save your Auto Message.
Voice Call Reminder
Voice call reminders are audio messages sent to clients’ phones. This can either take the form of a pre-recorded MP3/WAV file, or a Text-to-Speech (TTS) voice.
-
Click one of the New Message buttons and choose Add Call.
-
Fill out the information about your call reminder:
-
Name - enter a descriptive name for the reminder.
-
Purpose - select whether this reminder should be Booking/Initial, Reminder, or Followup.
-
When - enter the time before or after the appointment that this reminder should send.
- IMPORTANT - make sure the Time of day is set to either Any or a Custom Schedule encompassing the entire day.
-
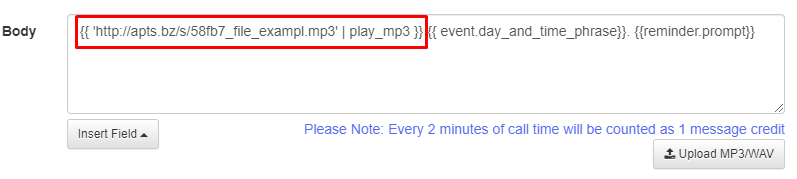
Body - If using TTS, enter the message for your client in the body. This message will be translated into speech and sent to the client.
-
TTS Voice - select whether to use the female or male TTS voice.
-
-
If you are using a recorded MP3 or WAV message:
- click the Upload MP3/WAV button.
- Select your MP3 or WAV recording file.
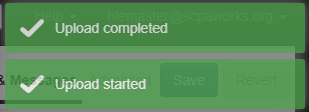
- You will know your upload completed successfully when you see two things:
-
You see the Upload completed notification in the top-right of Apptoto.
-
The body of the reminder has changed to include the URL to your uploaded file.
-
-
Click Done to save your reminder.
How to Edit Reminders
- Click on the name of the reminder you want to edit, or click Edit in the options menu for the reminder.
- In the Message Editor, make any desired changes.
- Press Done to close the Message Editor.
- You MUST click the Save button on the top-right to save your changes. Otherwise, they will be discarded.

How to Create Rules
Rules in Apptoto are conditional statements. Conditional statements are basic “if, then…” logic statements that are often used to determine how something will proceed. In Apptoto, these rules can be used to perform actions when certain conditions are met.
-
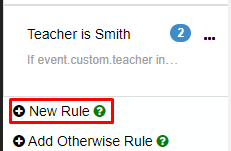
Click the New Rule button at the bottom of the rule list.
-
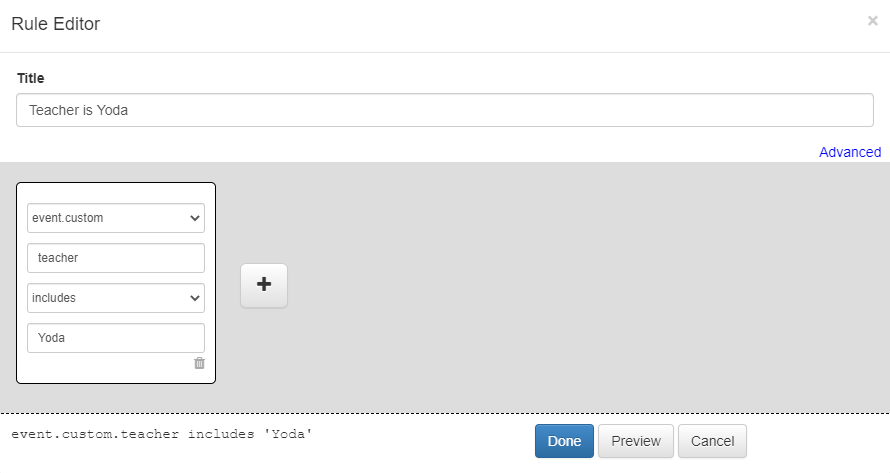
In the Rule Editor, give your rule a descriptive title.
-
Using the drop-down menus, begin building your logical statement. You can see the full conditional statement at the bottom of the Rule Editor.
- Select the data field you want to filter by (i.e. event.name, participant.email, etc.).
- Choose a logical operator.
- Enter the desired data value(s) in the last field.
-
Add additional conditions to your statement using the Add (gray with plus sign) button, if desired.
-
Click Preview to see if any matching appointments are found with your conditional statement. Ensure Show Recent is checked.

-
When you are satisfied with your rule, click Done.
-
Associate reminders with your rule. See the How to Associate Reminders with Rules section below for more detailed instructions.
-
Don’t forget to click Save on the top-right to save all your changes!
How to Edit Rules
-
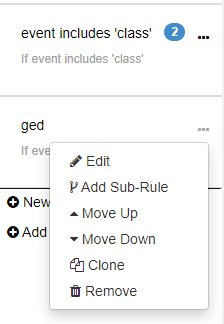
Open the context menu (…) next to the rule’s name.
-
Click Edit.
-
In the Rule Editor, make your desired changes.
-
Click Done to close the Rule Editor.
-
Don’t forget to hit Save to save your changes!
How to Associate Reminders with Rules
-
Click and drag the desired reminder over the rule you want to associate it with.
-
Drop the reminder over the dotted box that appears around the rule.
-
You should be able to see the number of reminders associated with a rule based on the blue number to the right of the rule name.
-
Don’t forget to hit Save to save your changes!
Advanced Settings
The Advanced tab allows you to access advanced settings. Here you can adjust prompts, how messages are delivered, auto responses, and more.
Let’s go over each section of the settings in detail.
For Reminders Settings
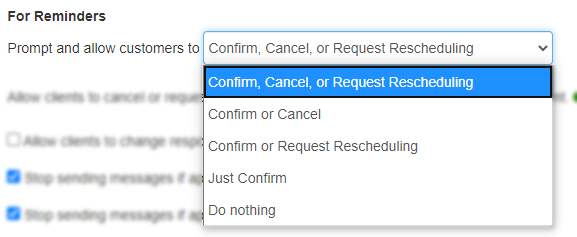
The setting pictured above allows adjustment of the reminder prompt. This is the prompt that appears after a reminder asking the participant to confirm, cancel, or reschedule their appointment. You can adjust this prompt for your needs by selecting a prompt option from the drop-down menu.
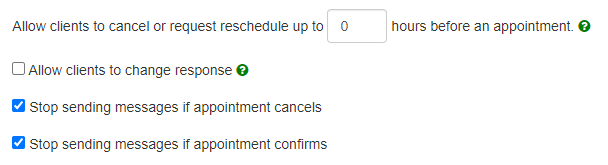
Allow clients to cancel or request reschedule up to hours before appointment - enter a grace period before the appointment that a client is allowed to reschedule or cancel their appointment. If the grace period is over, the client will not see the reschedule or cancel options in their prompt.
Allow clients to change response - if checked, this allows clients to change their response to the prompt. If they intially answer reschedule, for instance, they can later change their answer to cancel.
Stop sending messages if appointment cancels - if checked, reminder messages will not be sent if the appointment is canceled.
Stop sending messages if appointment confirms - if checked, additional reminder messages will not be sent once the client confirms their appointment.
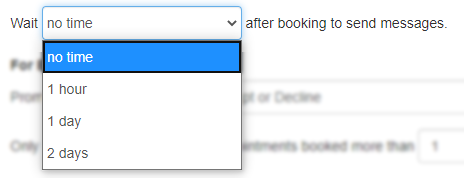
The above setting allows adjustment of the time period before Booking/Initial reminders are sent. If 1 hour is selected, the Booking/Initial reminder will not be sent until 1 hour after the client books their appointment.
For Booking/Initial Messages
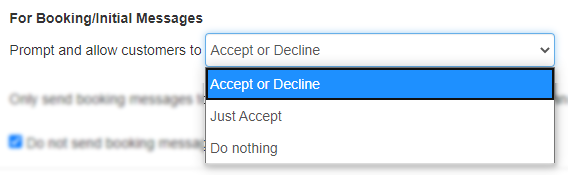
The above setting pertains to the prompt that will be displayed for Booking/Initial reminders. You can adjust whether the client has options to accept/deny an appointment.

Only send booking messages to appointments booked more than days in advance - The number here determines how many days in advance a client has to book their appointment in order to receive a Booking/Initial reminder.
Do not send booking messages if reminders already sent - if checked, Booking/Initial messages will not be sent to the client if they have already received reminders for the appointment.
Default Auto Replies
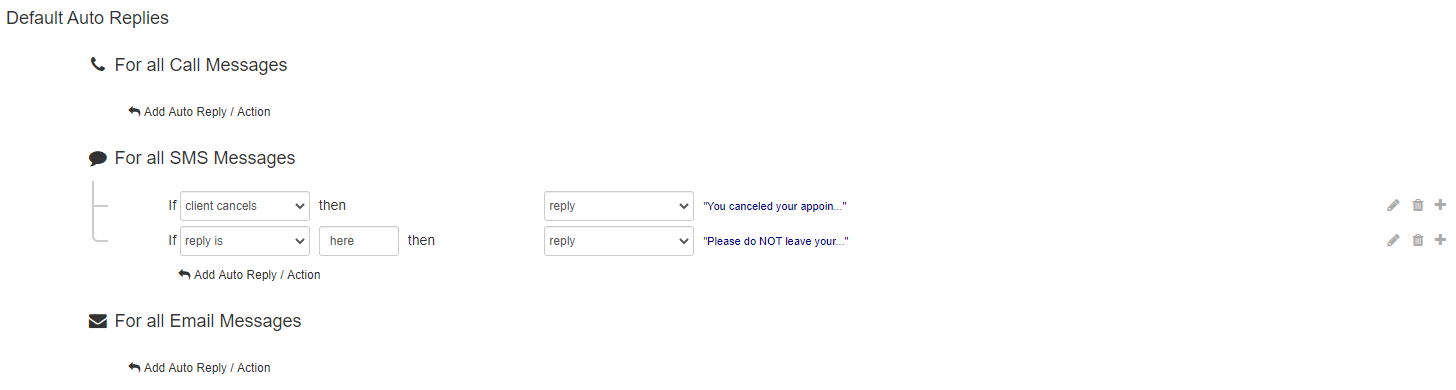
In this section, you can set different auto responses. These are messages sent to the client when they respond to reminders. For example, if the client responds “cancel” to their reminder prompt, Apptoto can automatically send a response to that message.
How to Edit Default Auto Replies
- Click the Add Auto Reply/Action button in the desired reminder category.
- Choose a client action to respond to.
- Choose an action for Apptoto to take when the client responds.
- Edit the contents of your response.