Using ScanSnap
This tutorial will guide you through using your ScanSnap Home software to scan papers. It is assumed that you have already set up your ScanSnap scanner and have successfully connected it to your computer.
Contents
- Introduction
- How to Scan from the PC
- How to Scan from the Scanner
- How to Edit Profiles
- How to Add New Profiles
- How to Search Documents
- Scan Settings in Detail
Introduction
This section will provide an overview of the terminology and the user interface of the program.
Important Terms
- ScanSnap Home - the primary software to control and manage ScanSnap scanners.
- Scan Window - the small window that appears on PC that controls the ScanSnap scanner.
- Profile - a preset that defines what media you are scanning and where you want to store it on your device.
- Receipt guide - a plastic part that can be inserted in the top of the scanner to easily scan receipt papers.
User Interface
ScanSnap Home Main Window

Scan Window
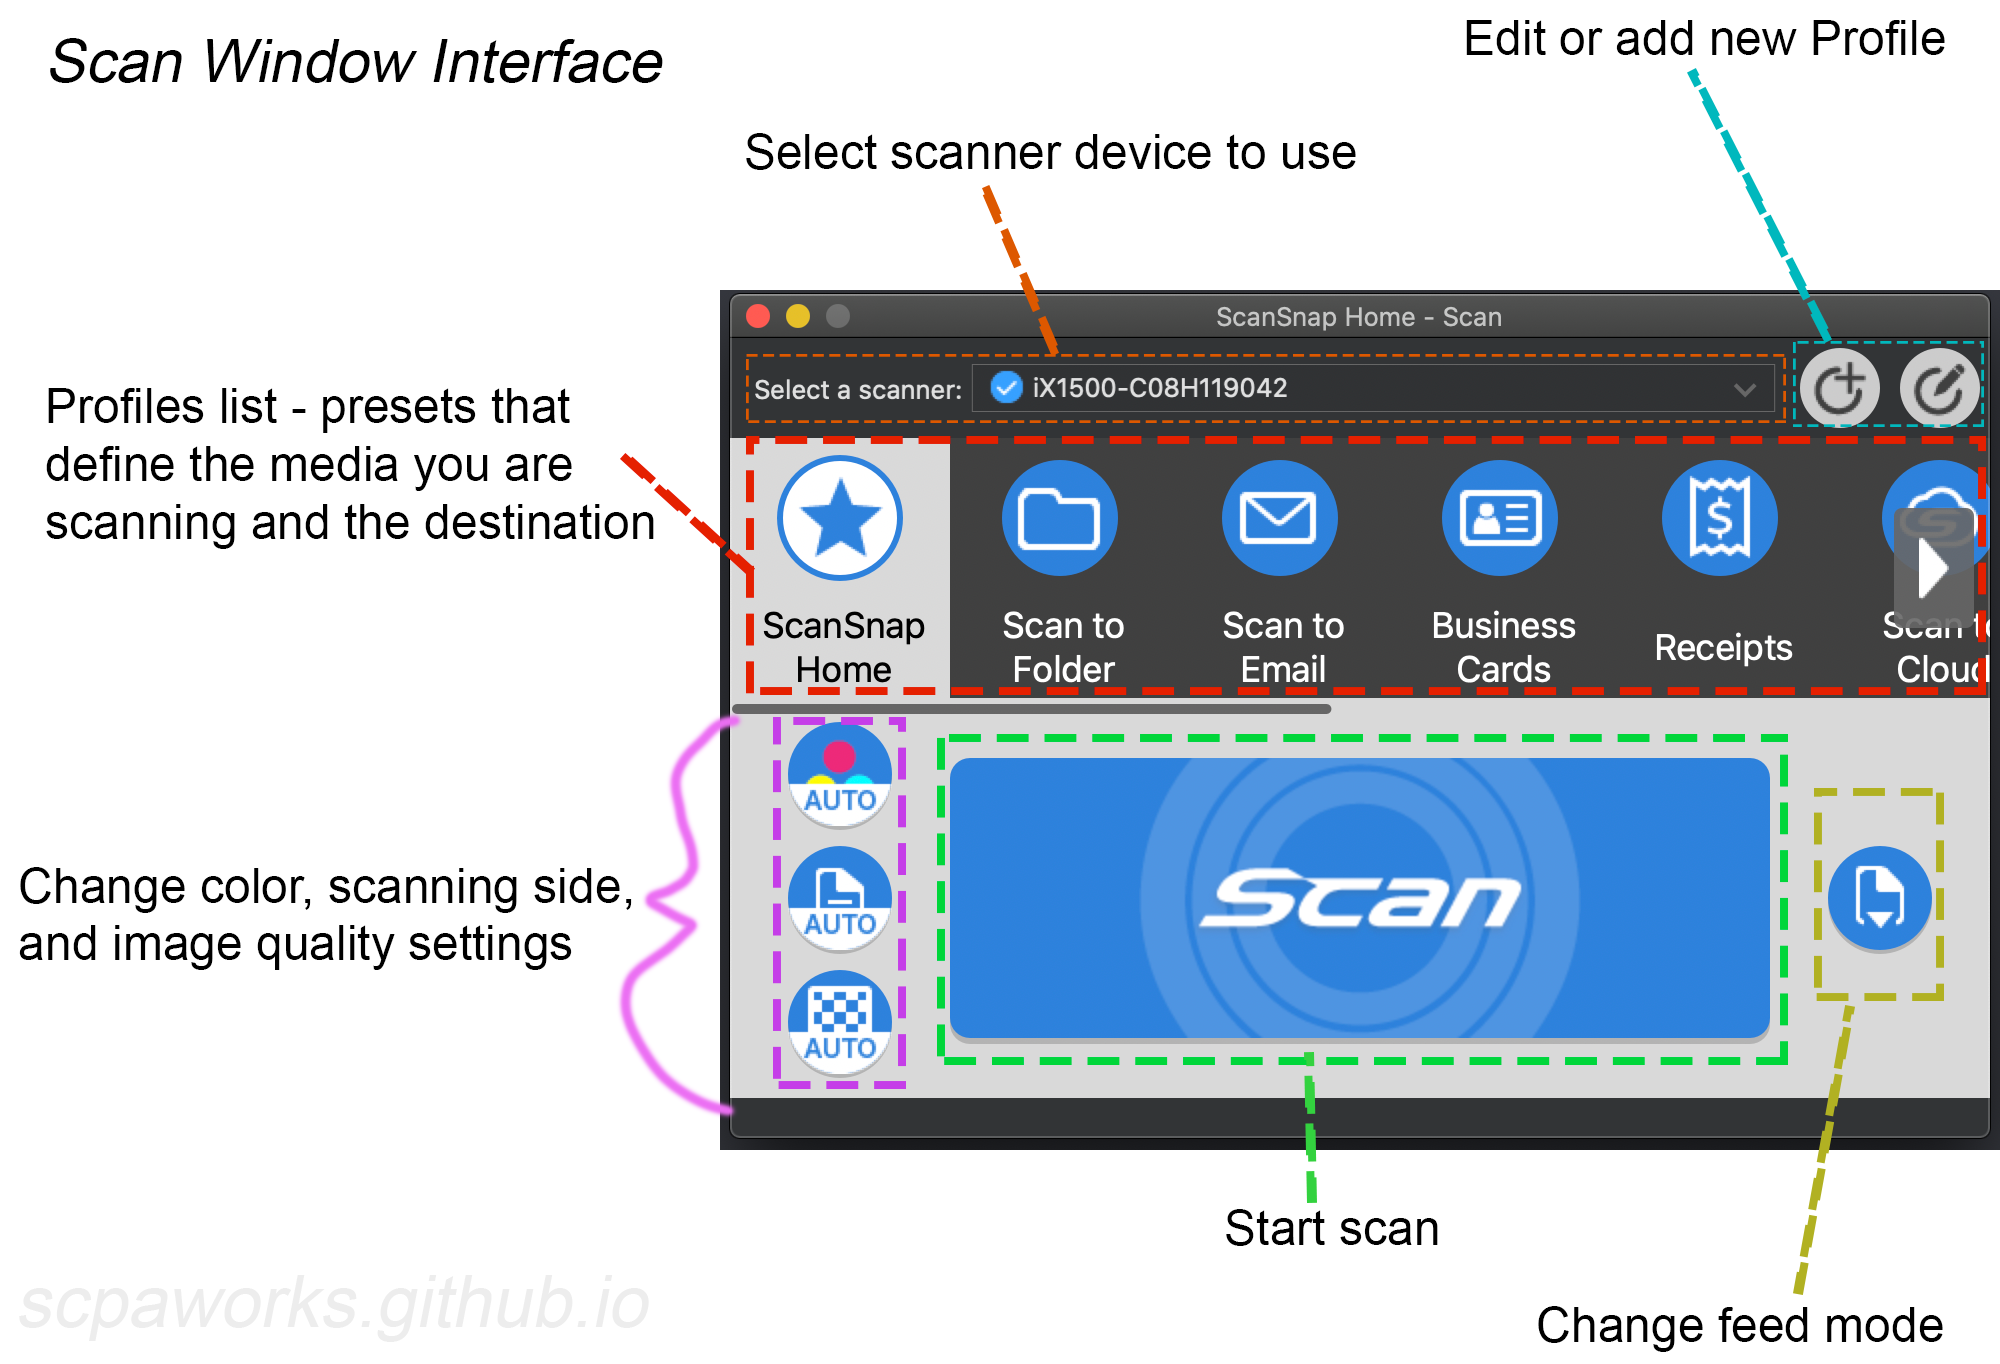
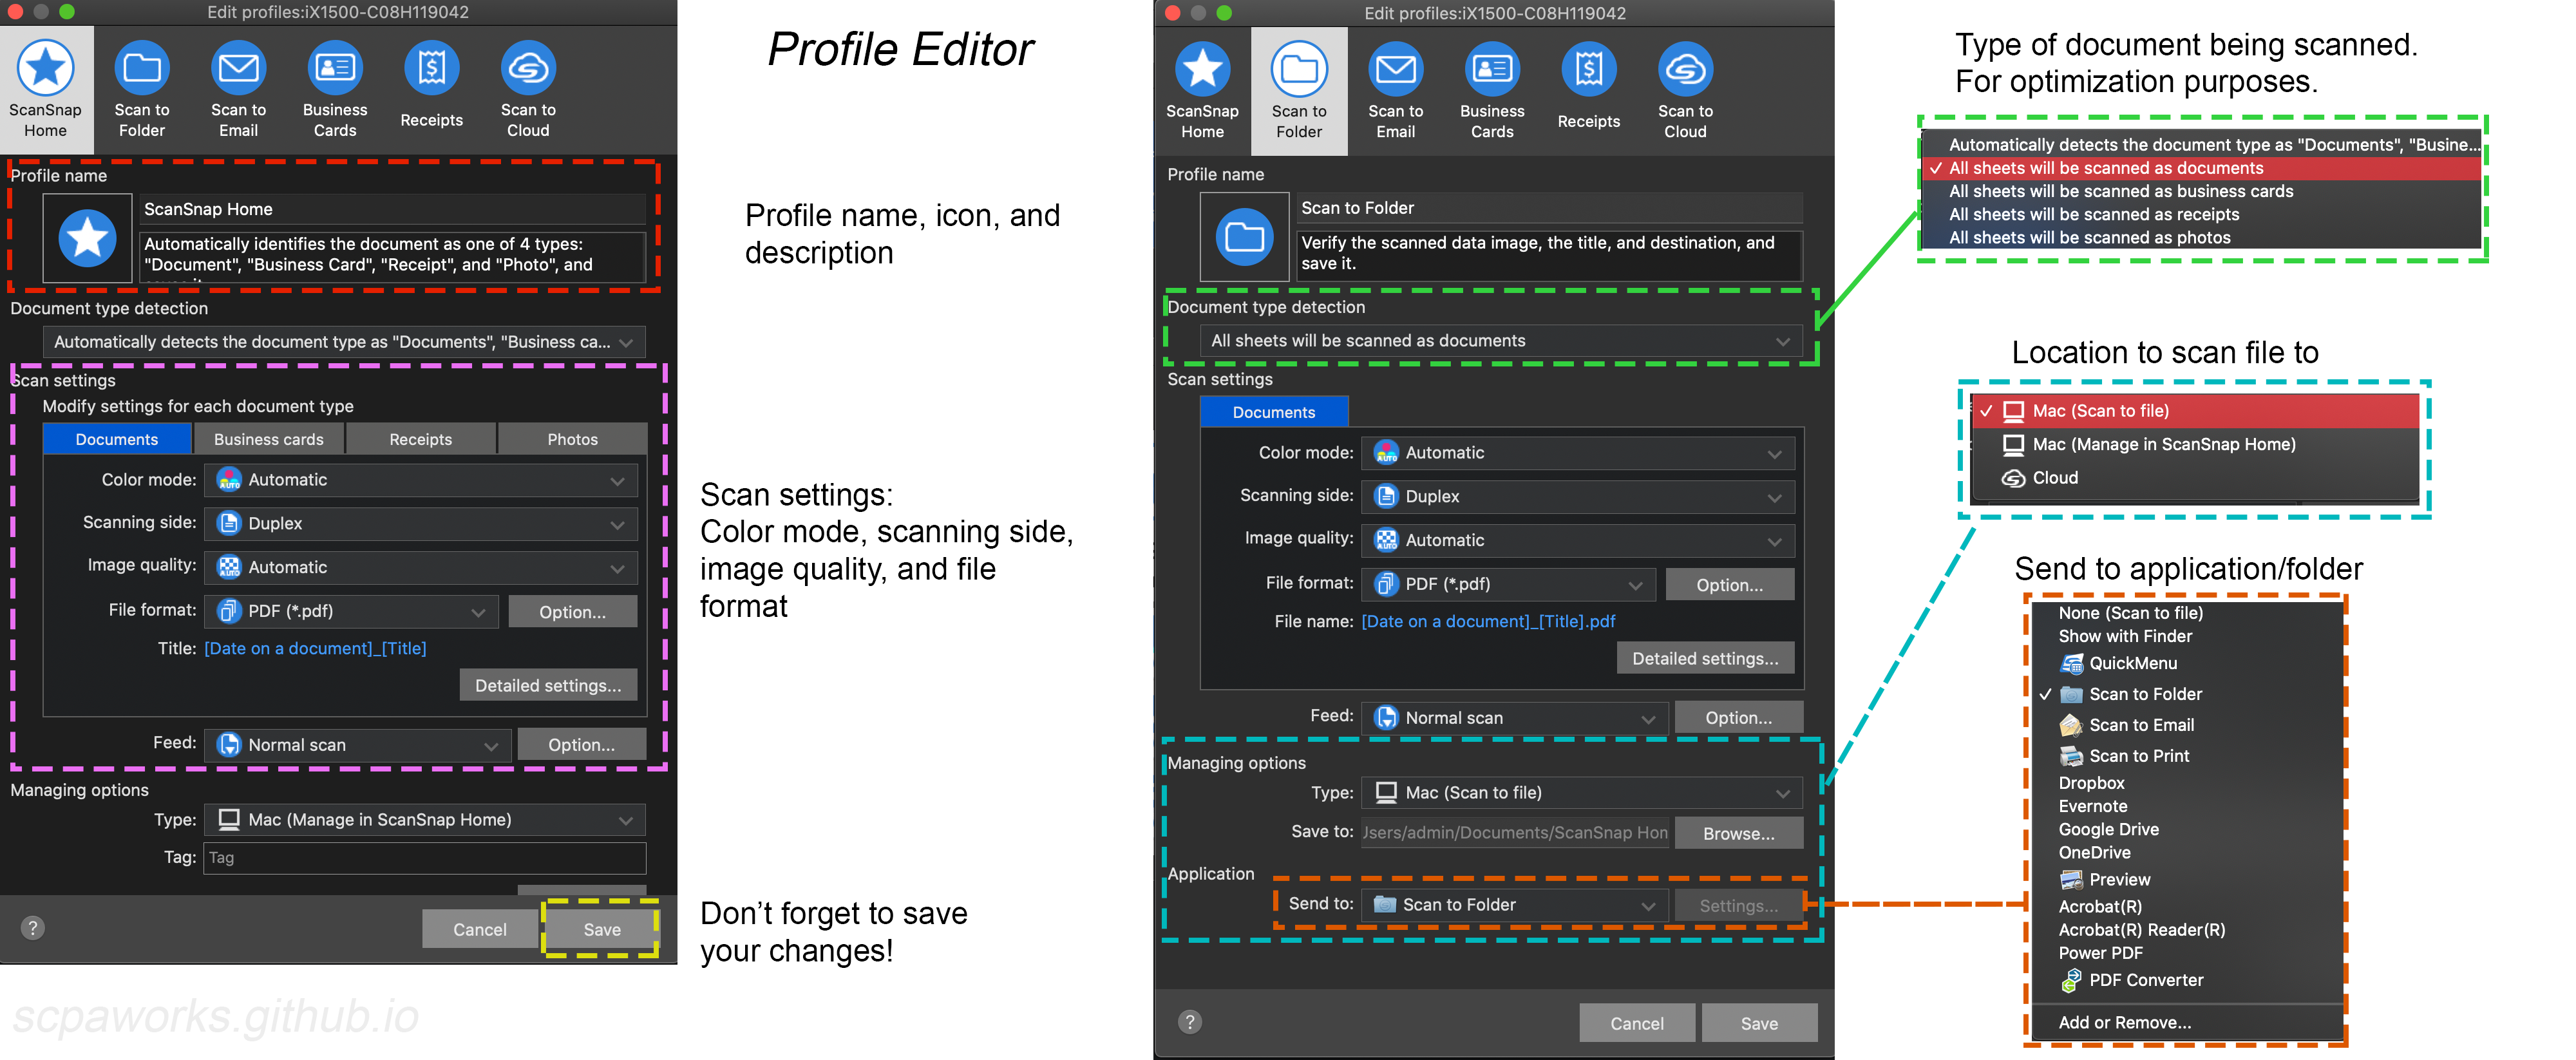
Profile Editor
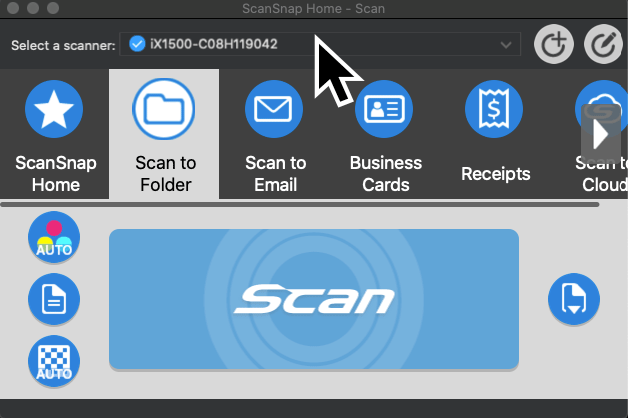
How to Scan from the PC
-
Open ScanSnap Home and place your documents in the scanner.
-
Click the Scan button in the top-left corner to open the Scan Window.
-
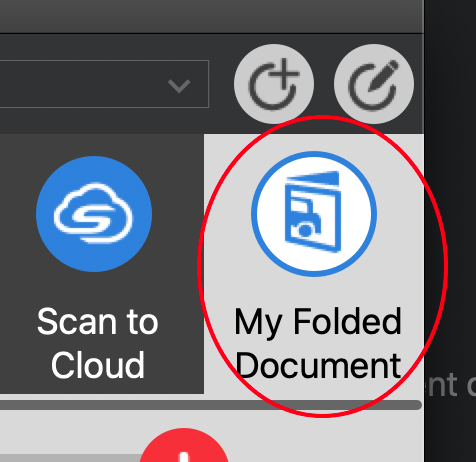
Select the Profile you want to use by clicking its icon. Adjust scanning settings if needed.
-
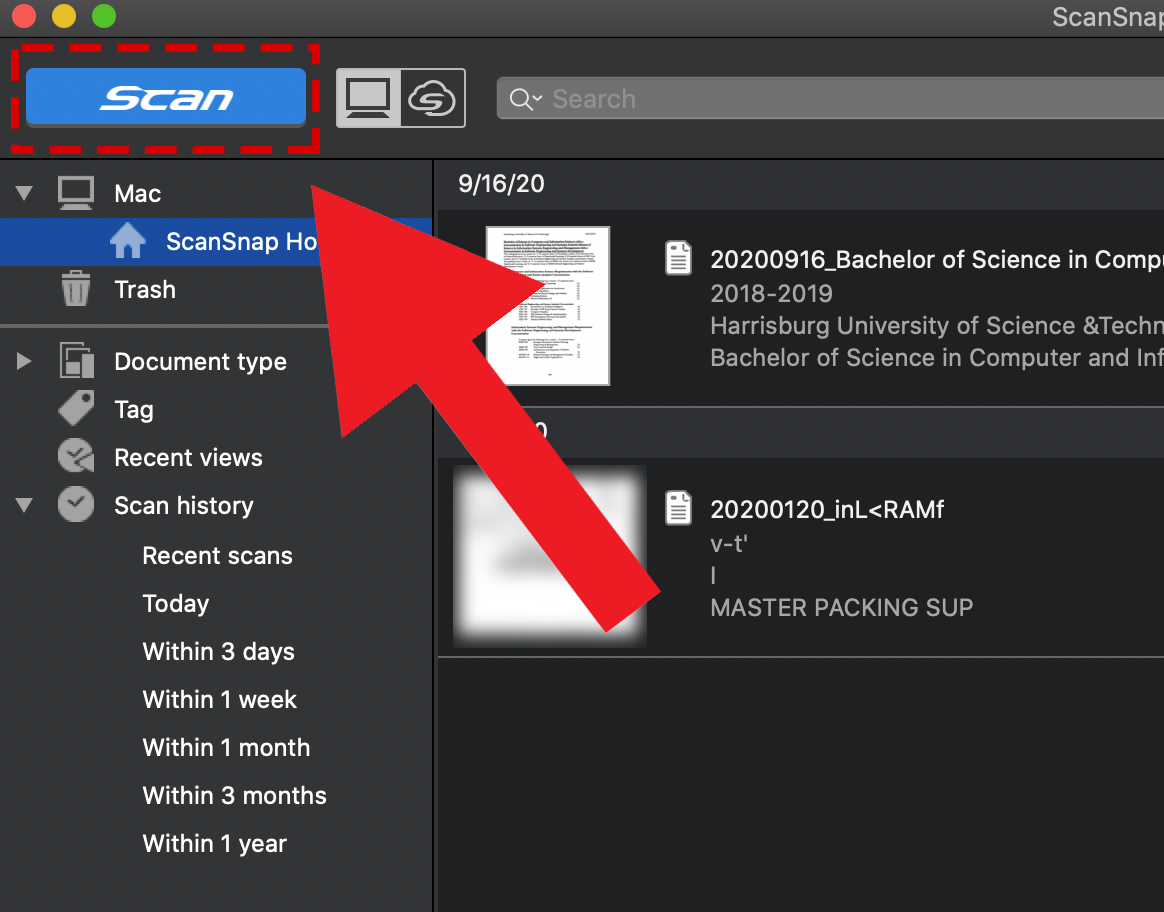
Click Scan to begin scanning your documents.
-
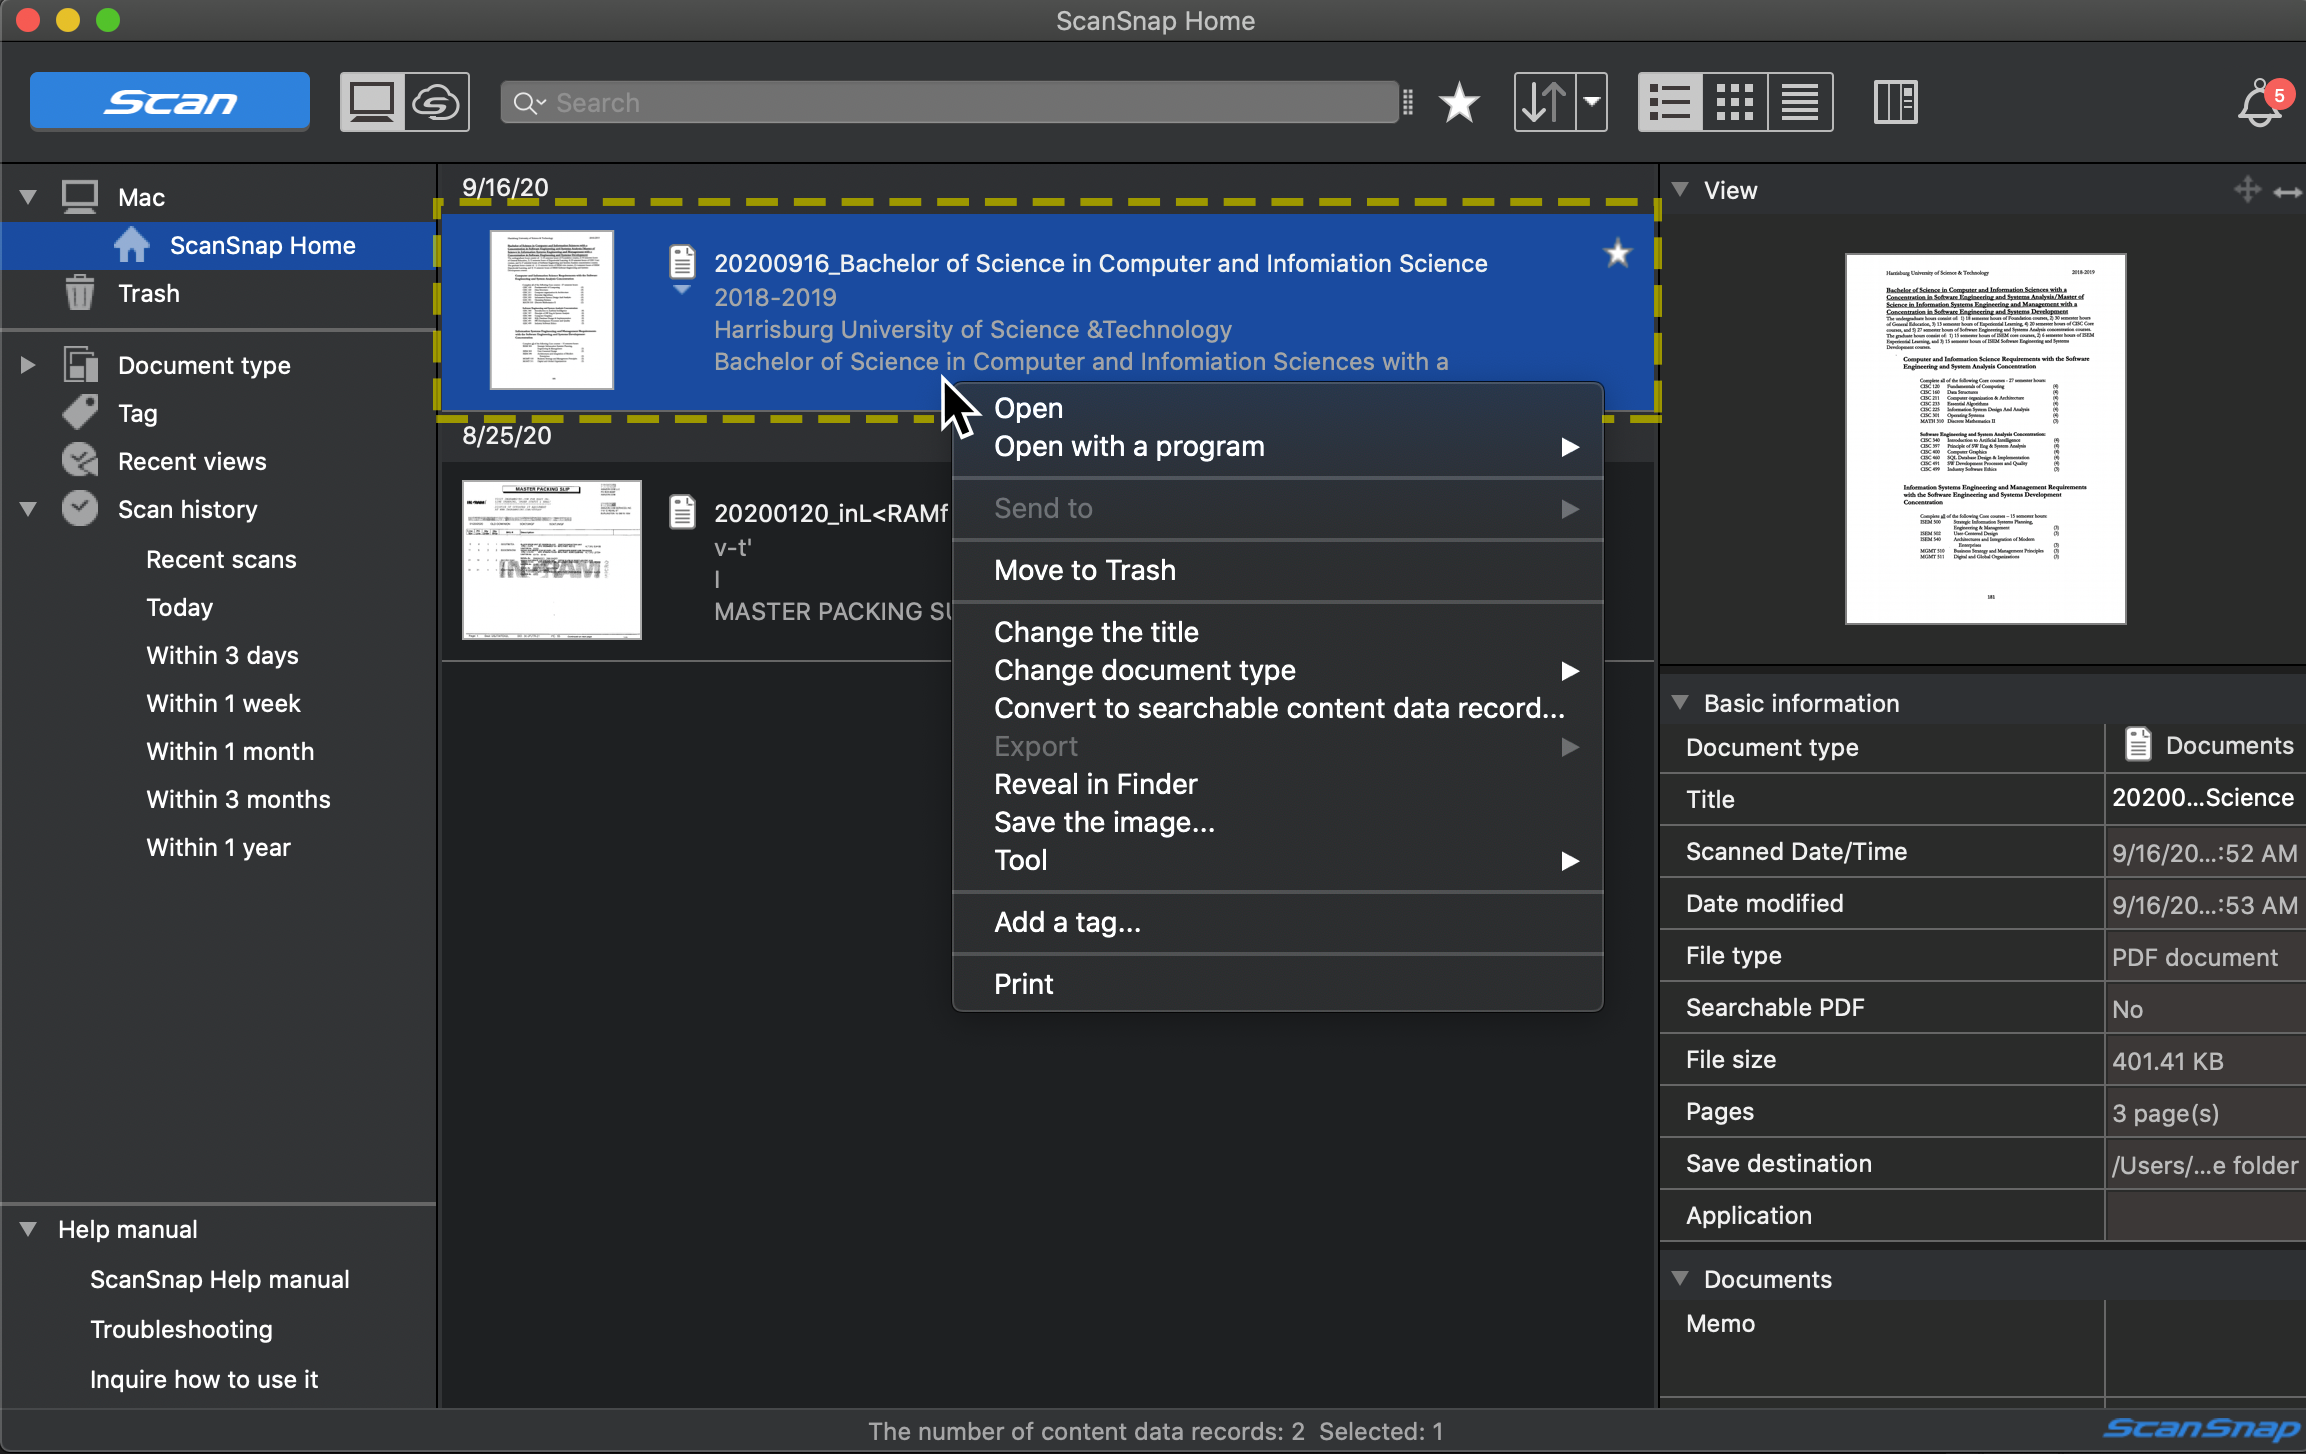
Once scanning is completed, your documents will appear in ScanSnap Home. In the below screenshot, the scanned document is outlined in yellow. You can right-click the document to perform actions or view its properties in the right-hand sidebar.
How to Scan from the Scanner
-
Open the scanner lid and place papers for scanning.
-
Select your profile and adjust scanning options as needed on the touchscreen.
-
Tap Scan to begin the scan.
-
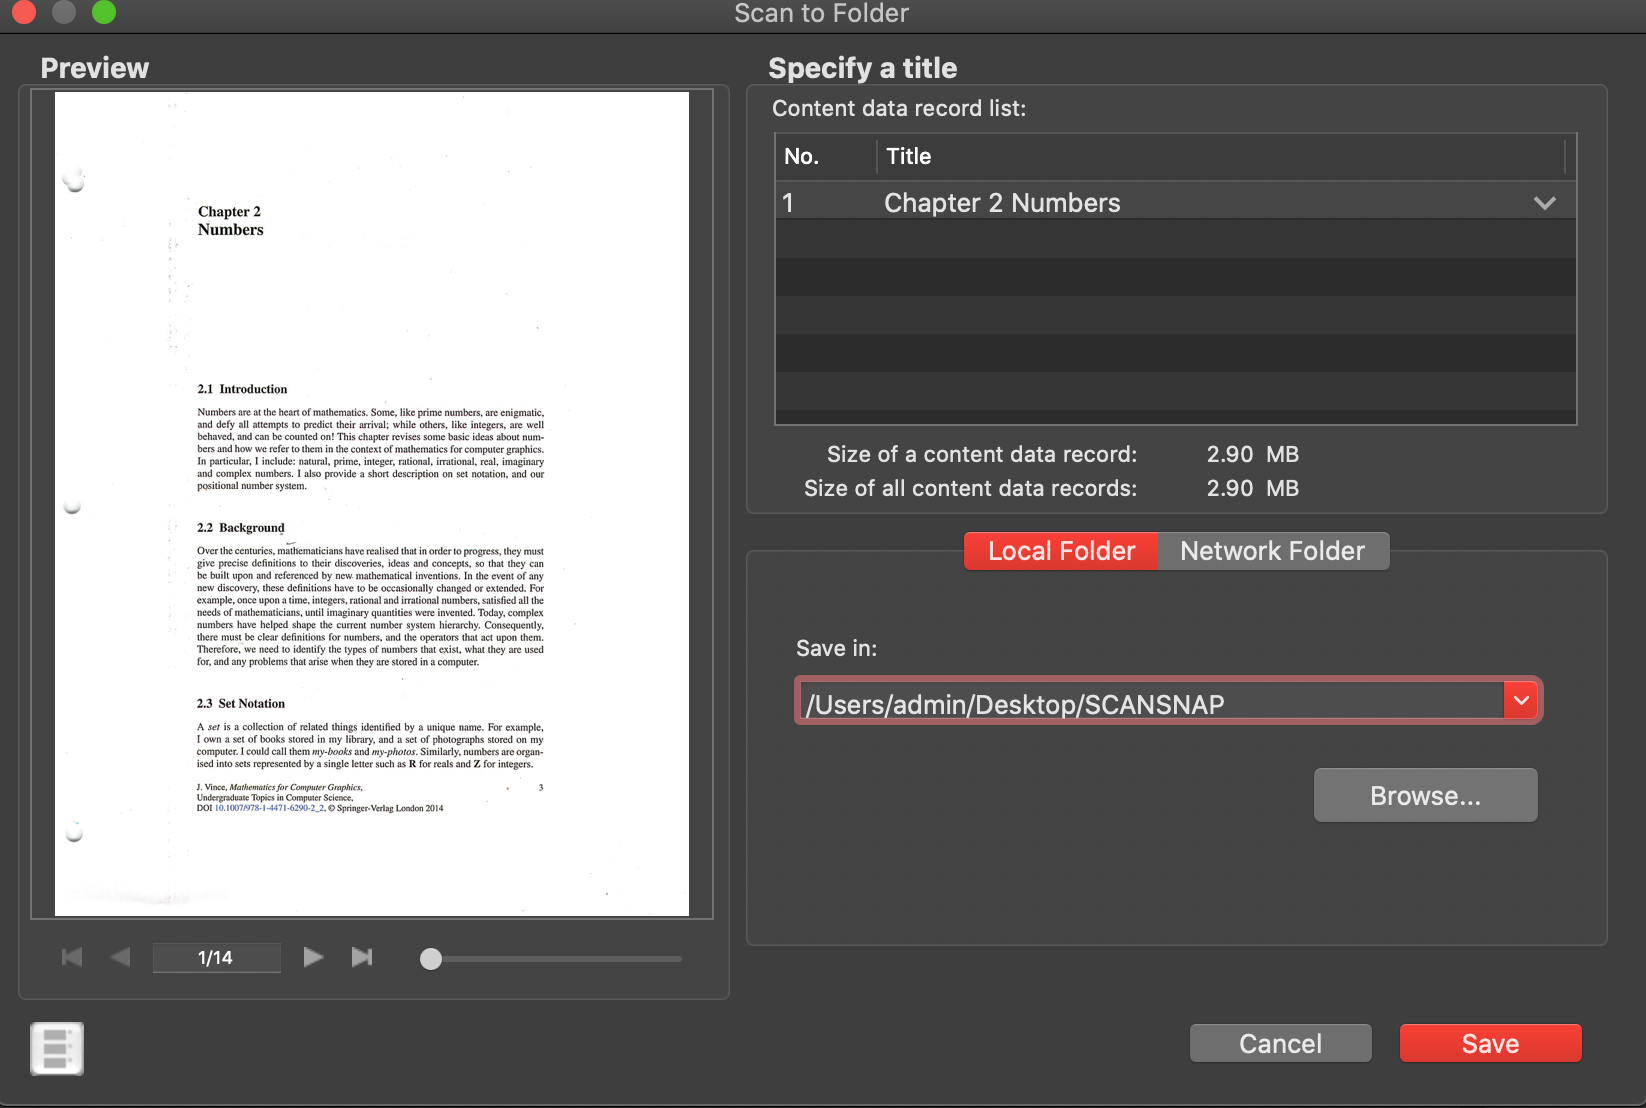
On your computer a scanning window will appear with your imported scans. Set the name of your file, verify the save location is correct, and click Save.
-
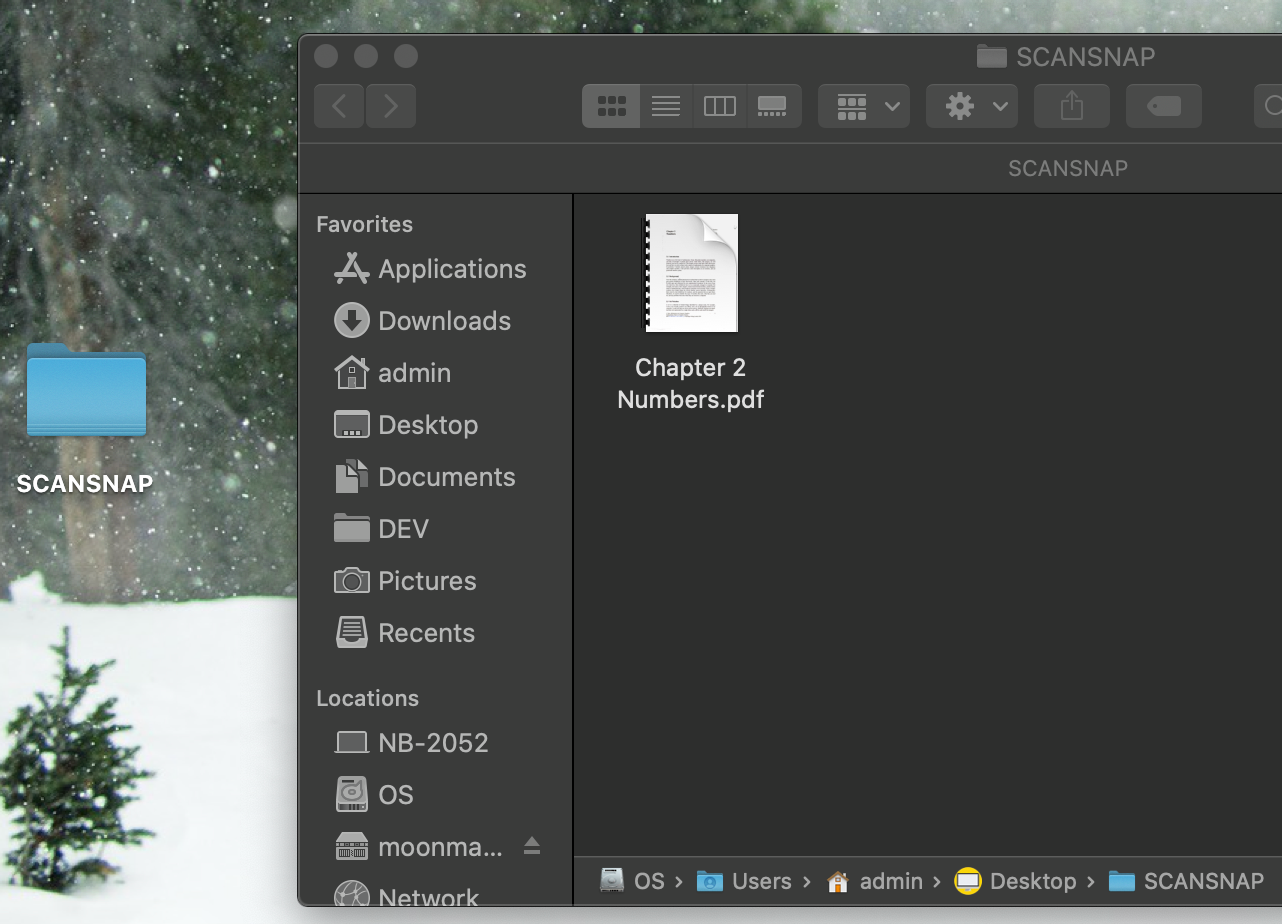
You can find your scanned file in the location specified. If you chose to scan to ScanSnap Home, you can find your scanned file in the ScanSnap Home dashboard.
See a demonstration of the scanning process on the scanner in the below video:
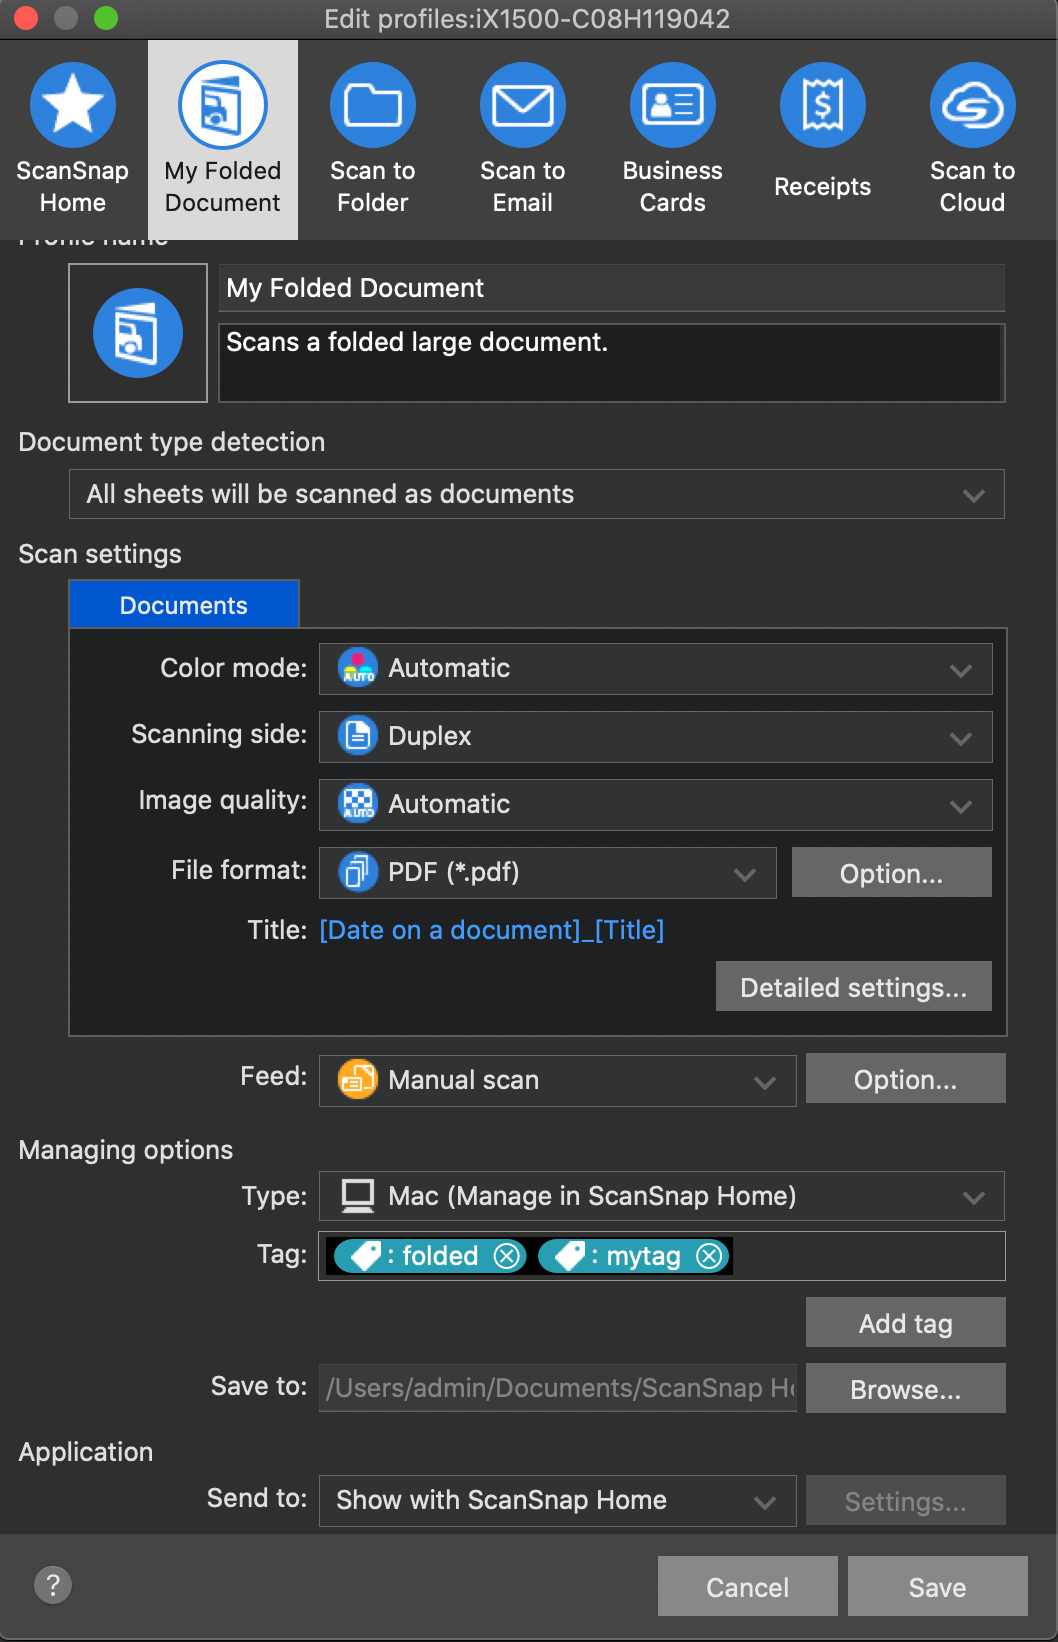
How to Edit Profiles
-
Open the Scan window.
-
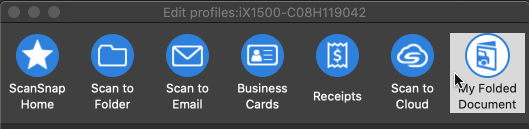
Click the profile you wish to edit, then click the Edit Profile button. The Edit Profiles window will appear. Profiles are listed vertically in the top panel. The selected profile’s details appear below the Profile listing.
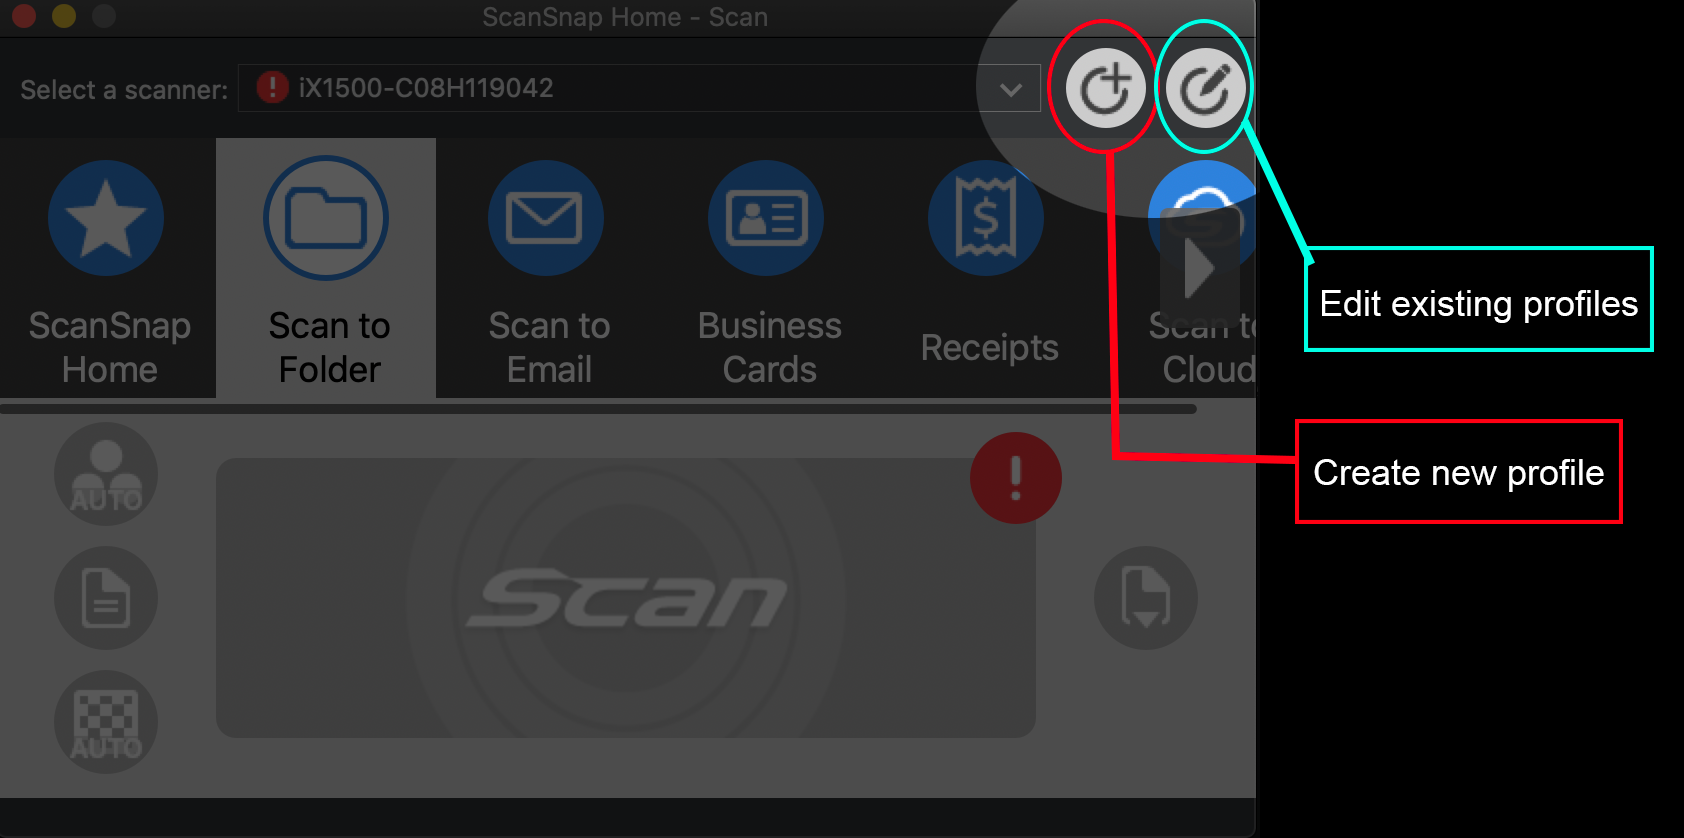
-
Edit the details to fit your needs. See Scan Settings in Detail for more information on settings.
-
You can rearrange a profile’s order in the Profile Bar by clicking and dragging it to a new position.
-
Click Save to save your changes.
How to Add New Profiles
-
Open the Scan window.
-
Click the New Profile button.
-
The Add New Profile window will open. The left column contains preset profile templates you can edit. The right column contains the details of your new Profile.
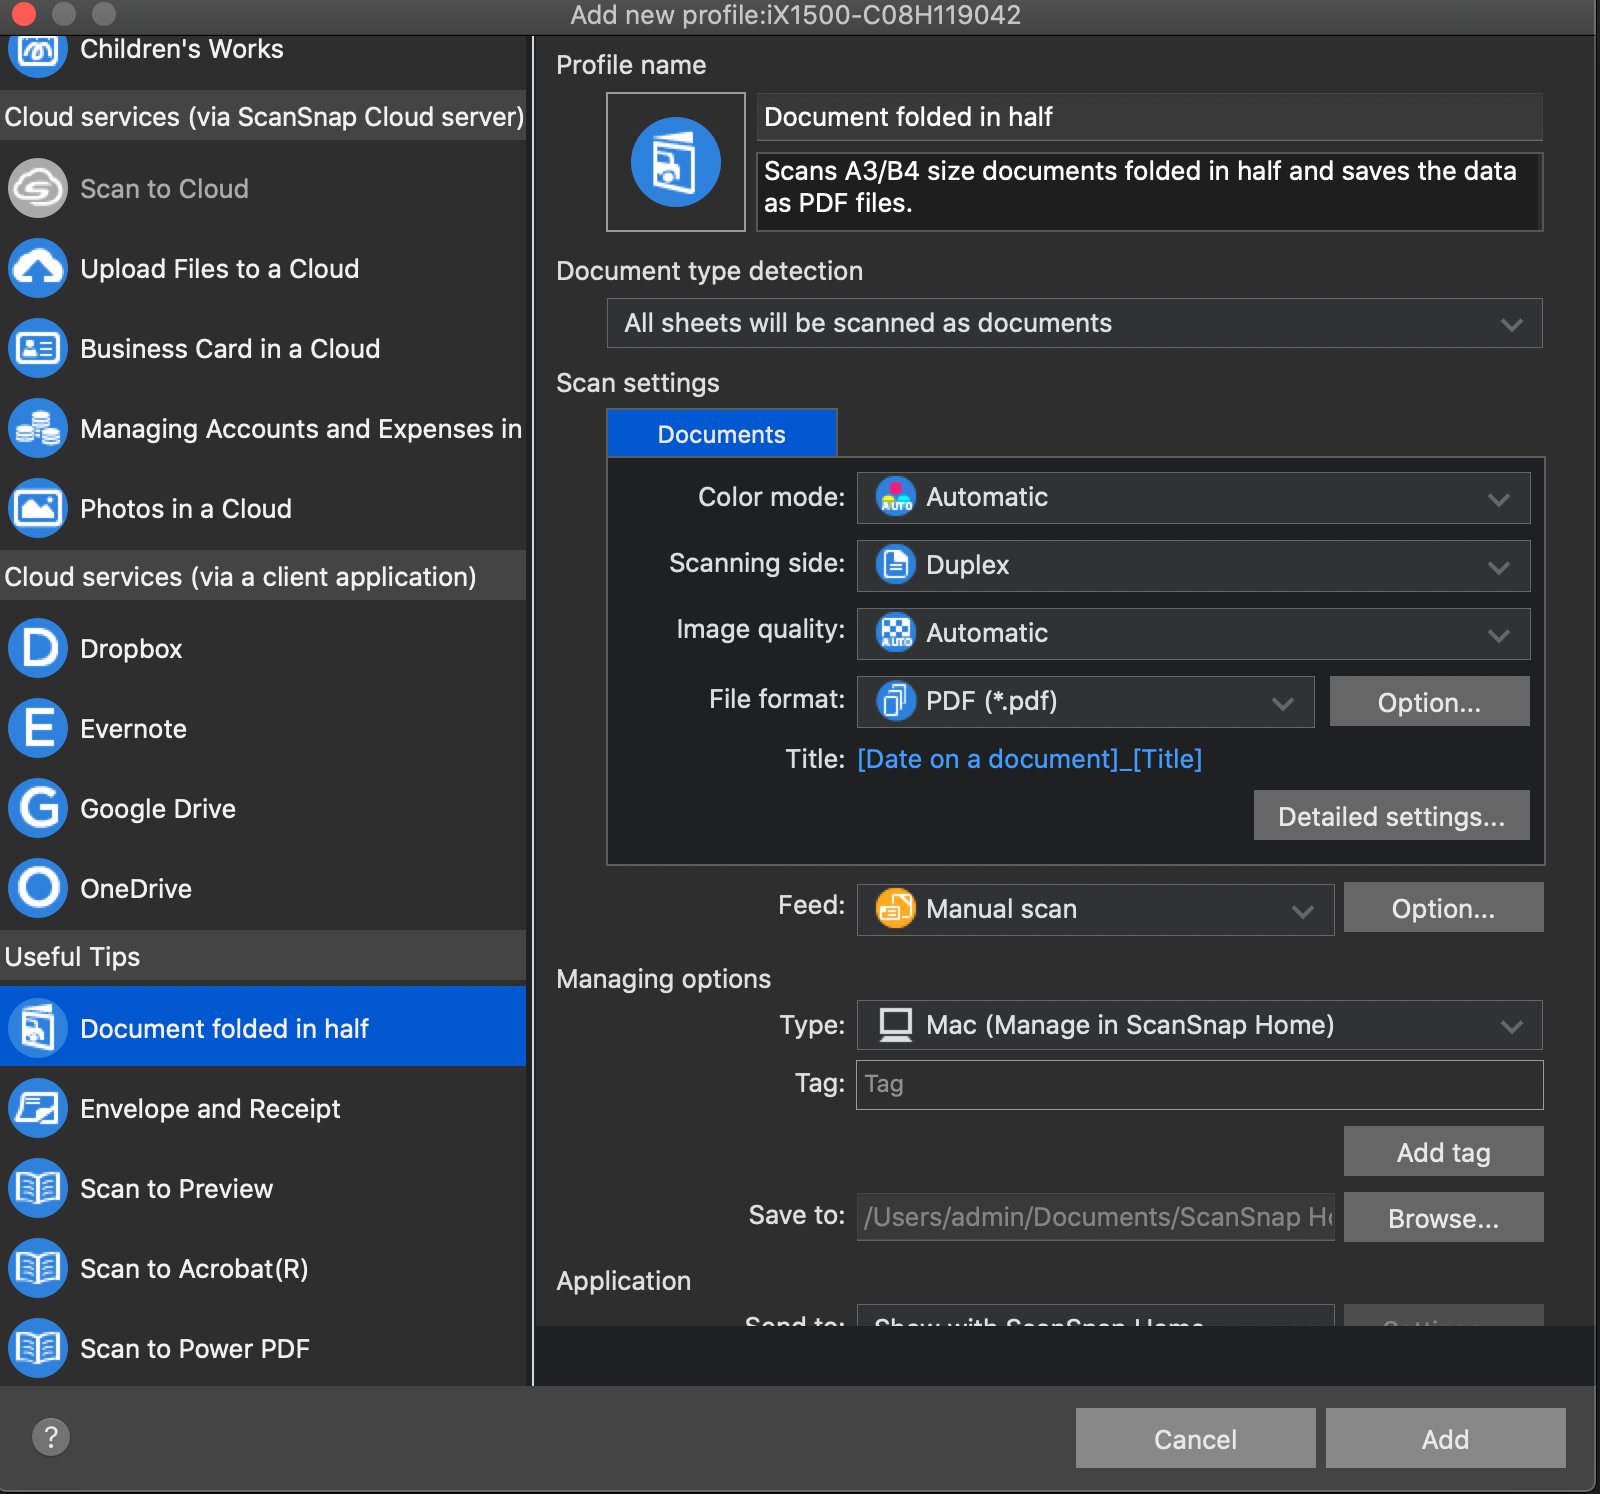
-
Click a preset to select it. Then, begin editing your Profile to fit your needs. See Scan Settings in Detail for more information on settings.
-
Click Add to save your profile. It will appear in the Scan window.
-
You can rearrange your profile’s order in the Scan window by dragging it in the Edit Profiles window.
How to Search Documents
-
Click the Search bar at the top of the ScanSnap Home window to select it.
-
Type in your search query.
-
Press Enter to search.
-
Click the x icon at the rightmost end of the search bar to clear your search when you are finished.

Scan Settings in Detail
Below is a description of each adjustable setting for scan Profiles.
Basic Settings
-
Profile name - a name and description to identify your Profile’s purpose
-
Icon - an icon that appears above your profile. Click it to open the icon picker. Click your desired icon, and then click Select.

-
Document type detection - what type of document the scanned papers are considered (receipt, business card, etc.)
-
Scan settings - adjust color mode, scanning side, image quality, and file format settings
-
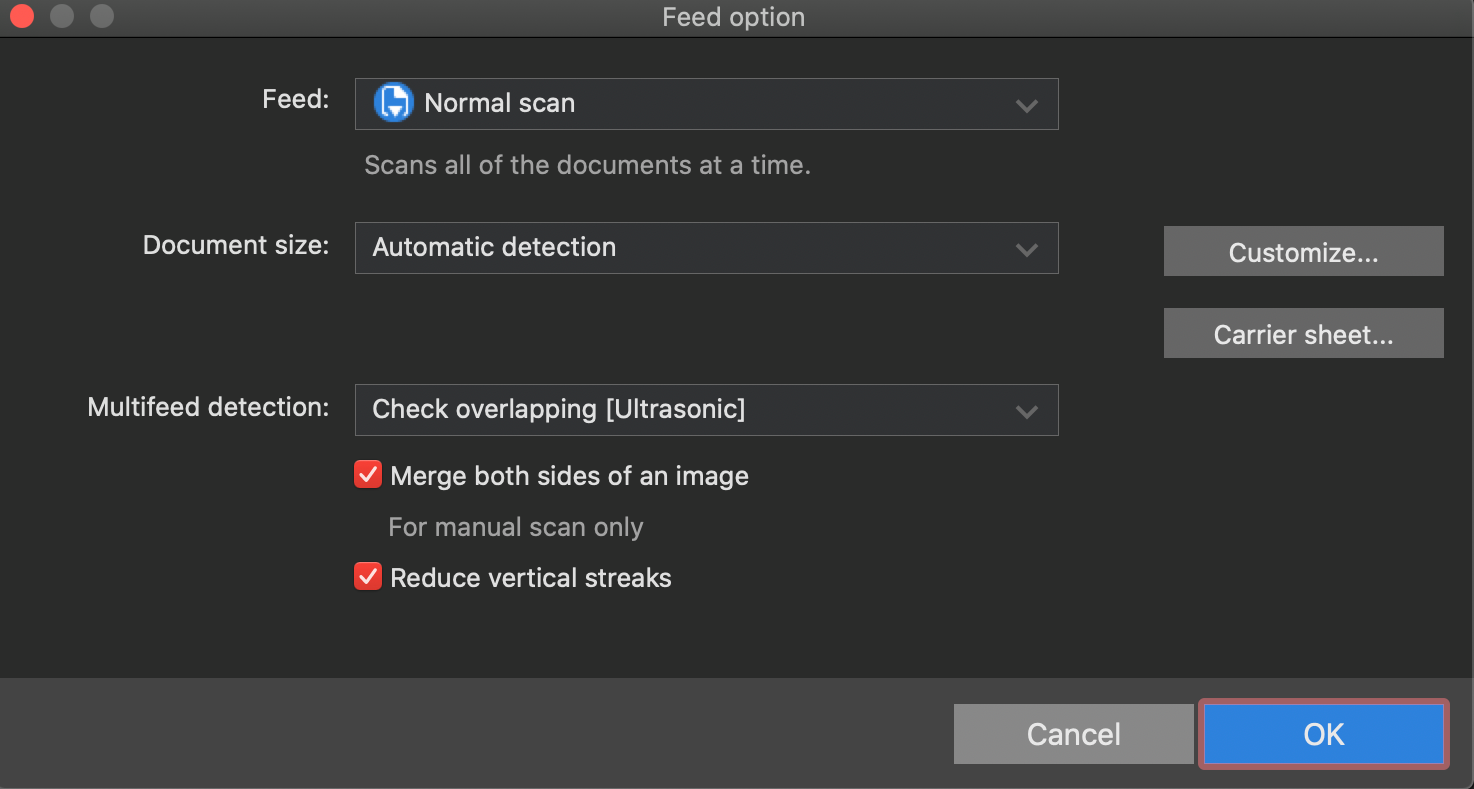
Feed - adjust the feed type (normal, continuous, or manual)
-
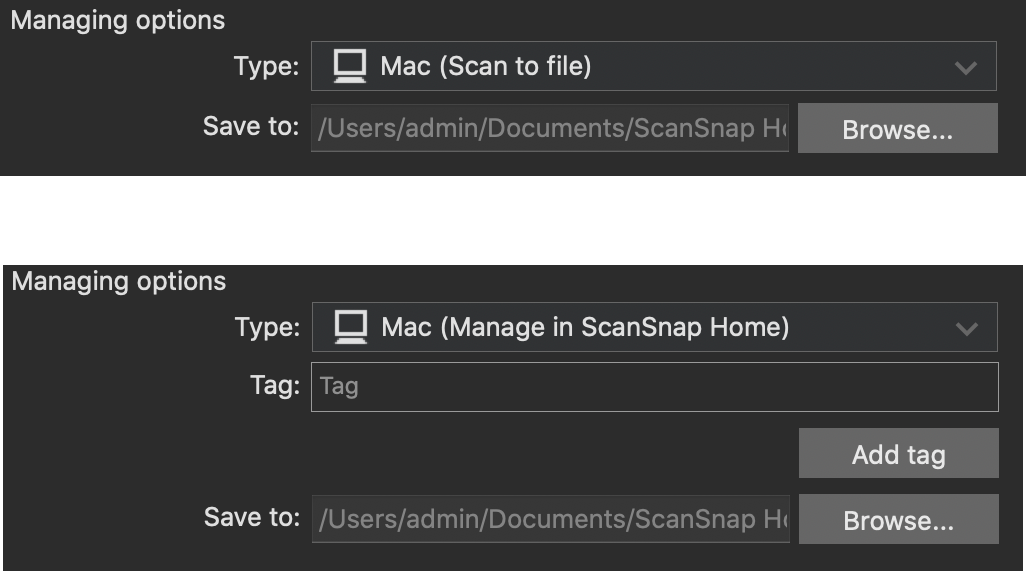
Managing options - select where to save your scanned documents
-
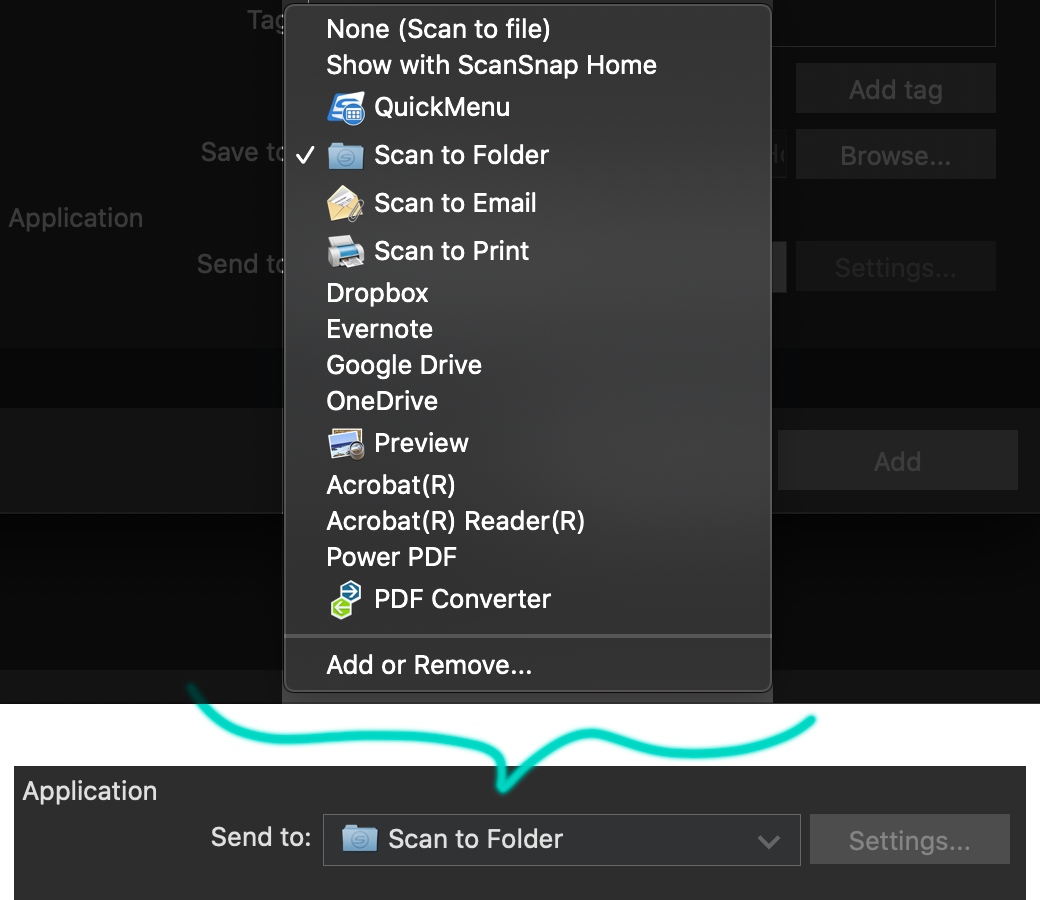
Application - select whether to send scanned documents to file or to an application (email, Evernote, Google Drive, etc.)
Detailed Settings
Accessed by clicking one of the Option… buttons on a profile’s settings page.
-
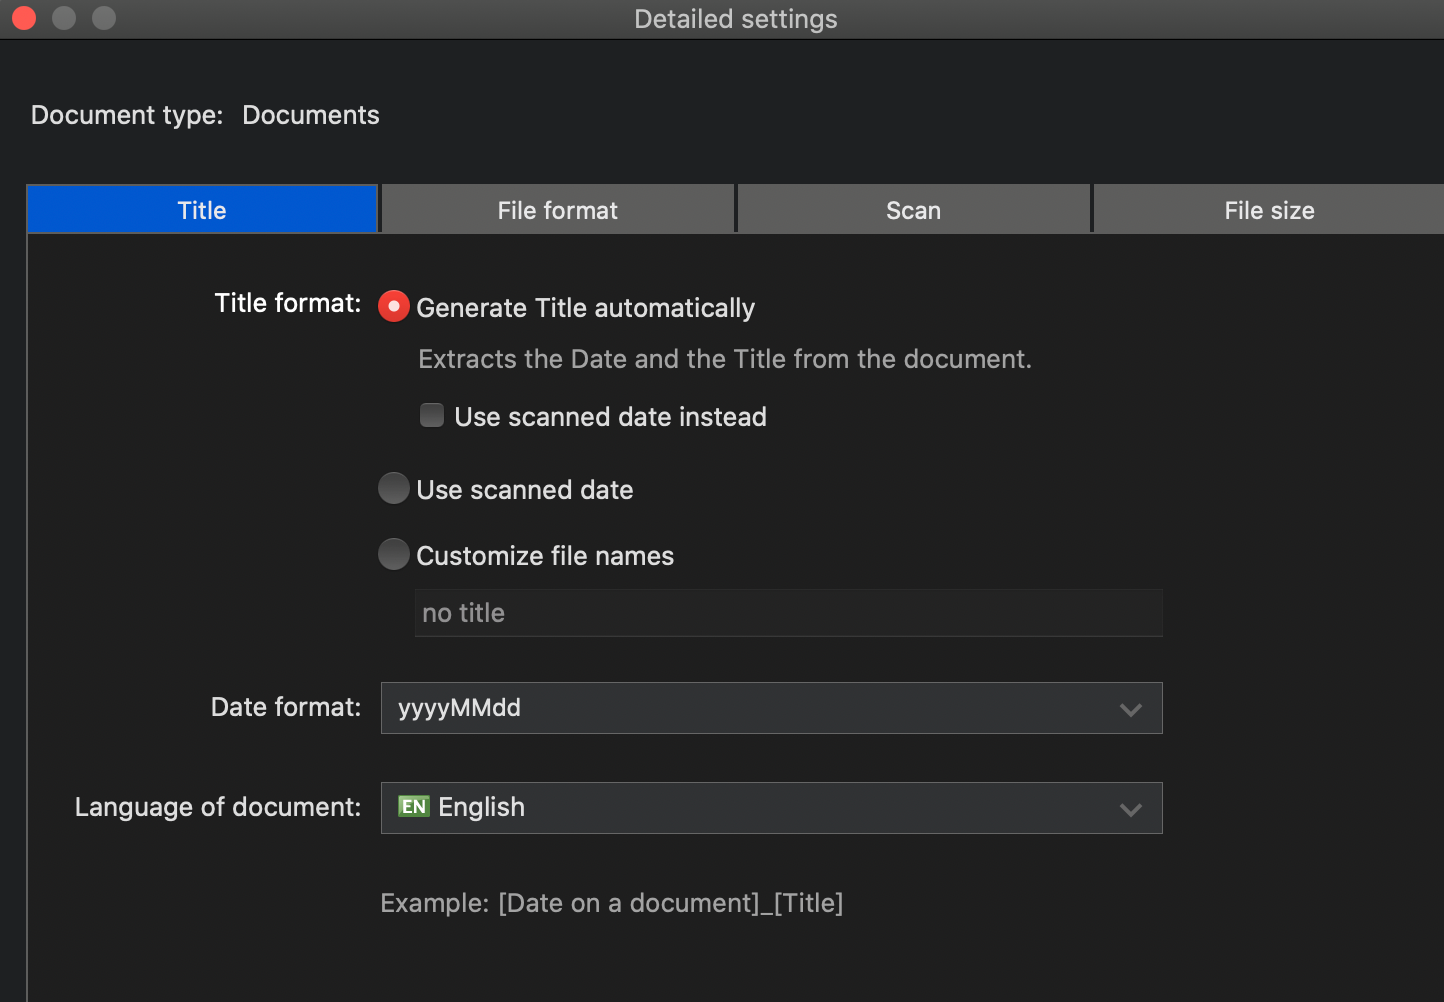
Title - adjust settings for the name of the file generated from the scan. Can be generated automatically or specified manually.
-
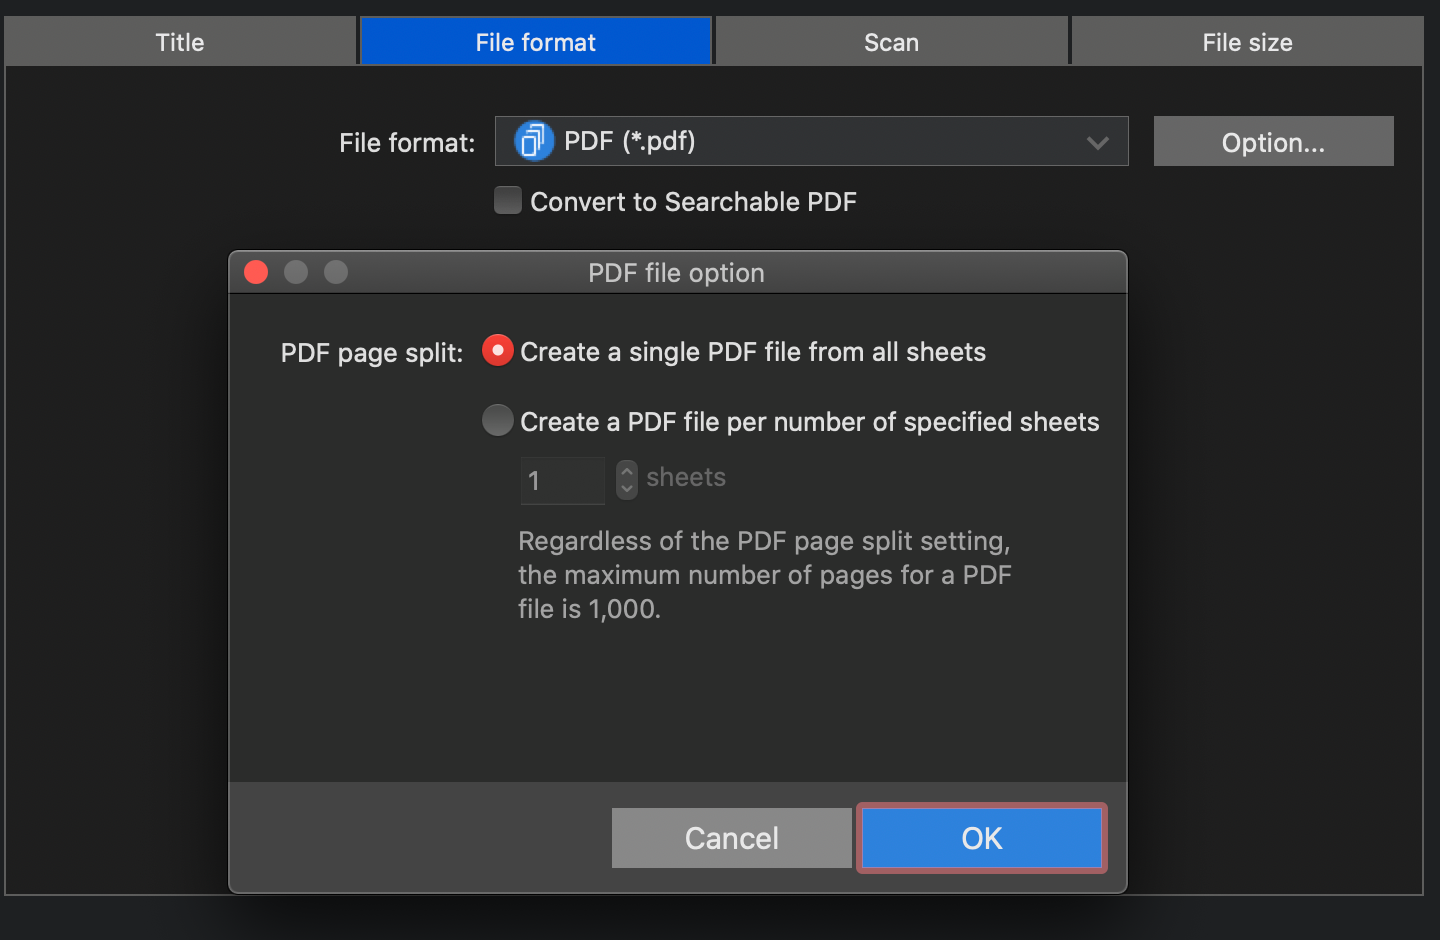
File format - adjust the file format the scanned document is saved as. Can be either PDF or JPEG. For PDF, click Option… to adjust settings for number of PDF files.
-
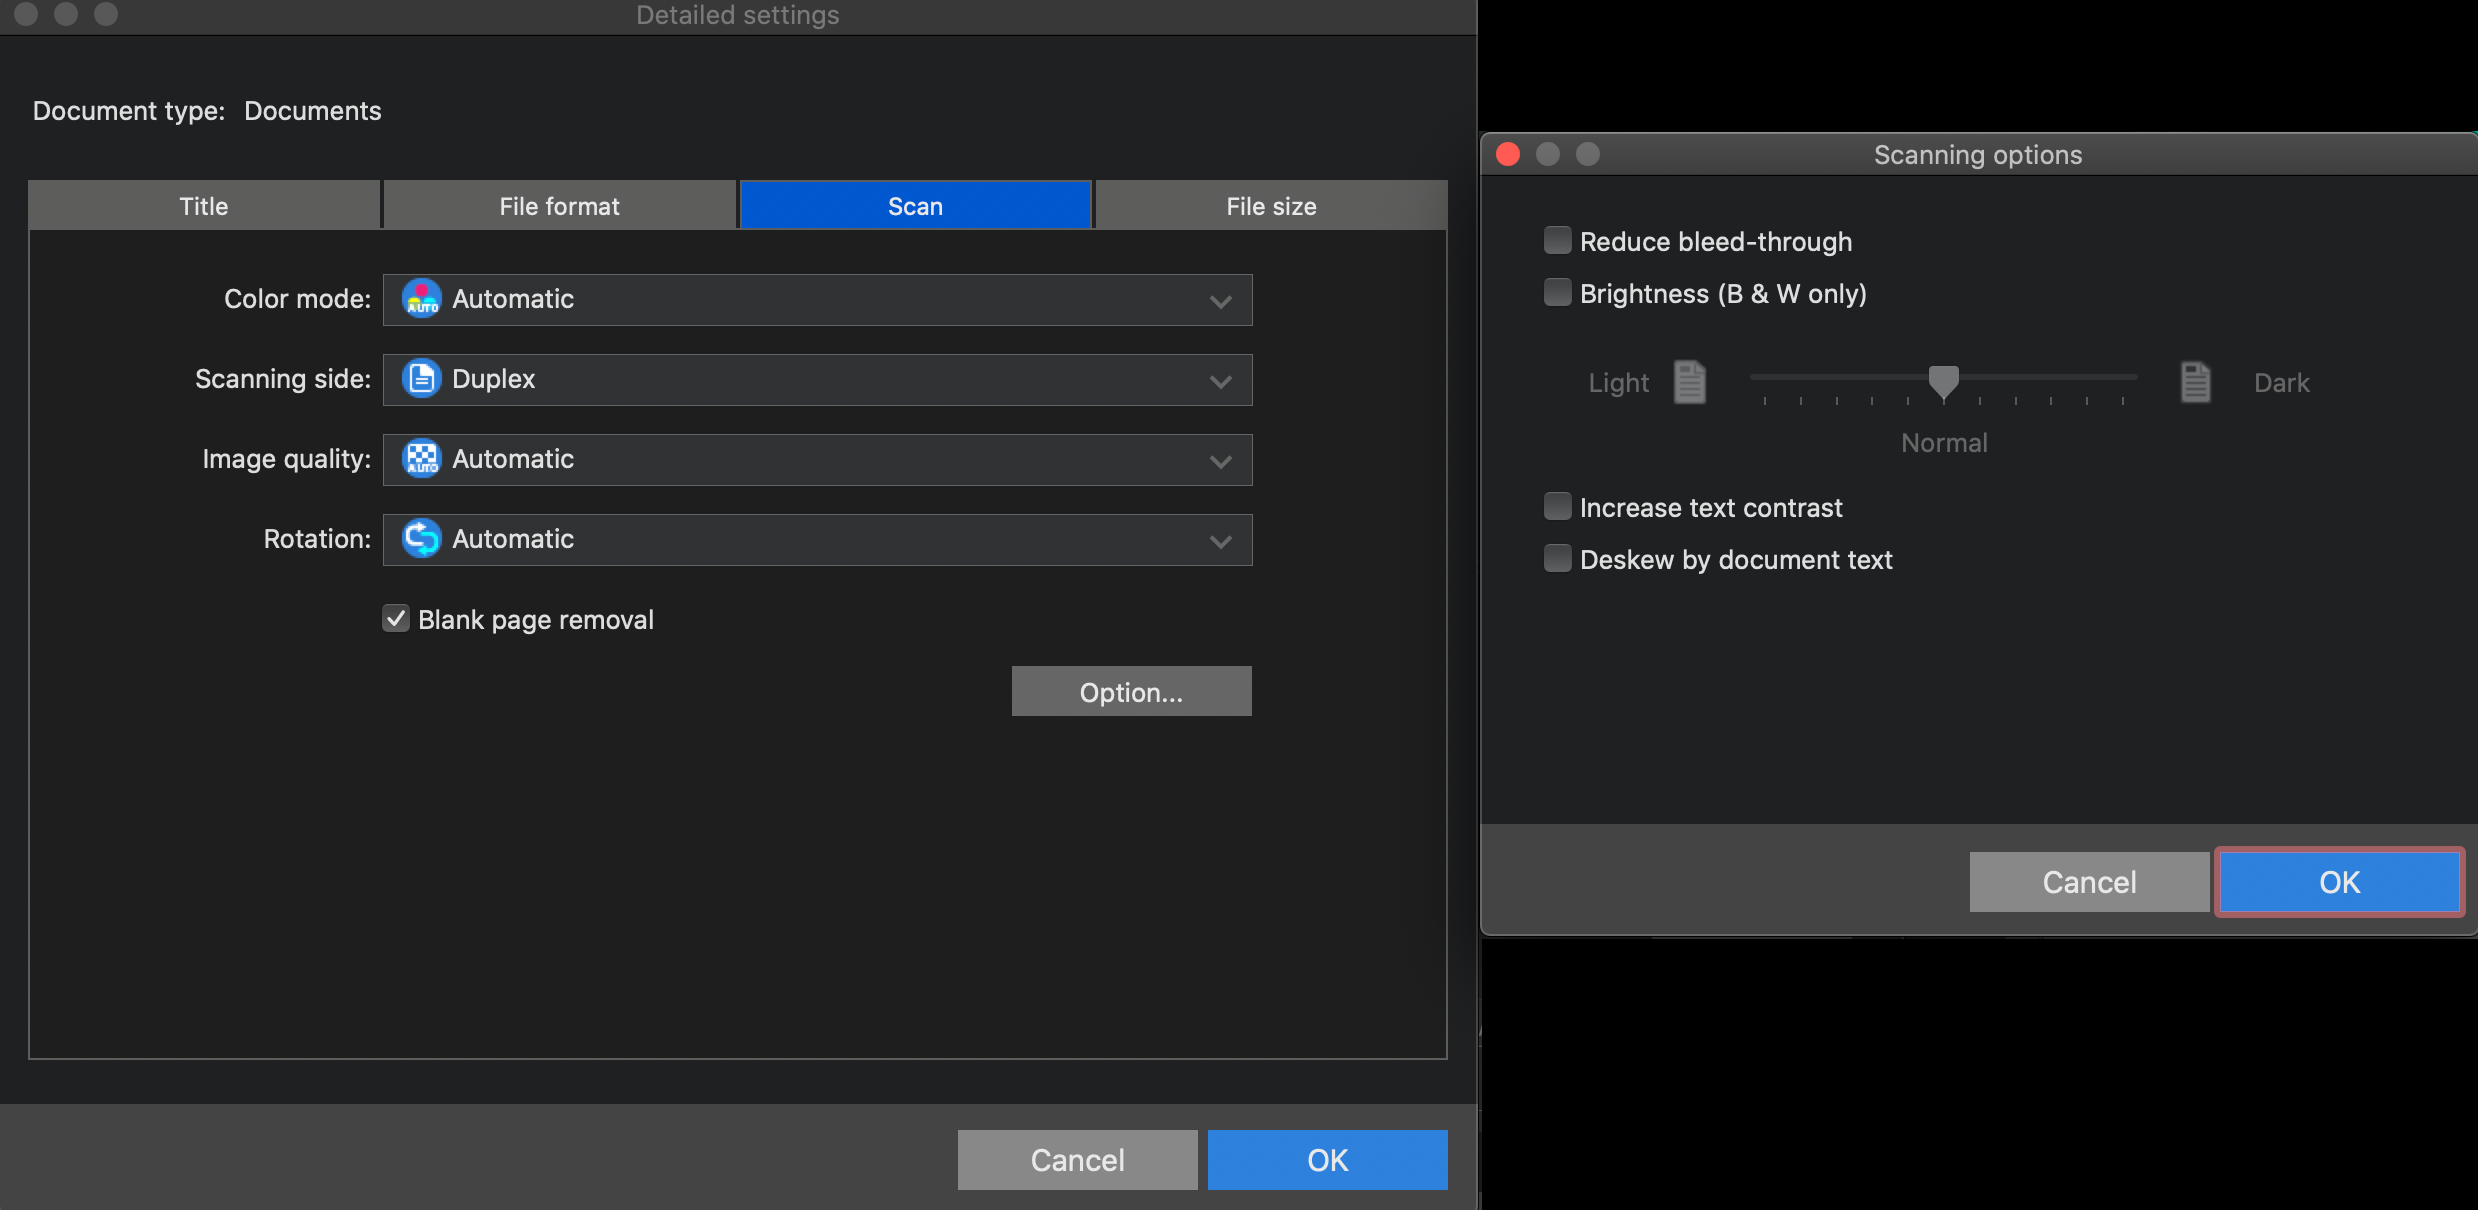
Scan - adjust settings for scanning. Click Option… to adjust advanced size options.
-
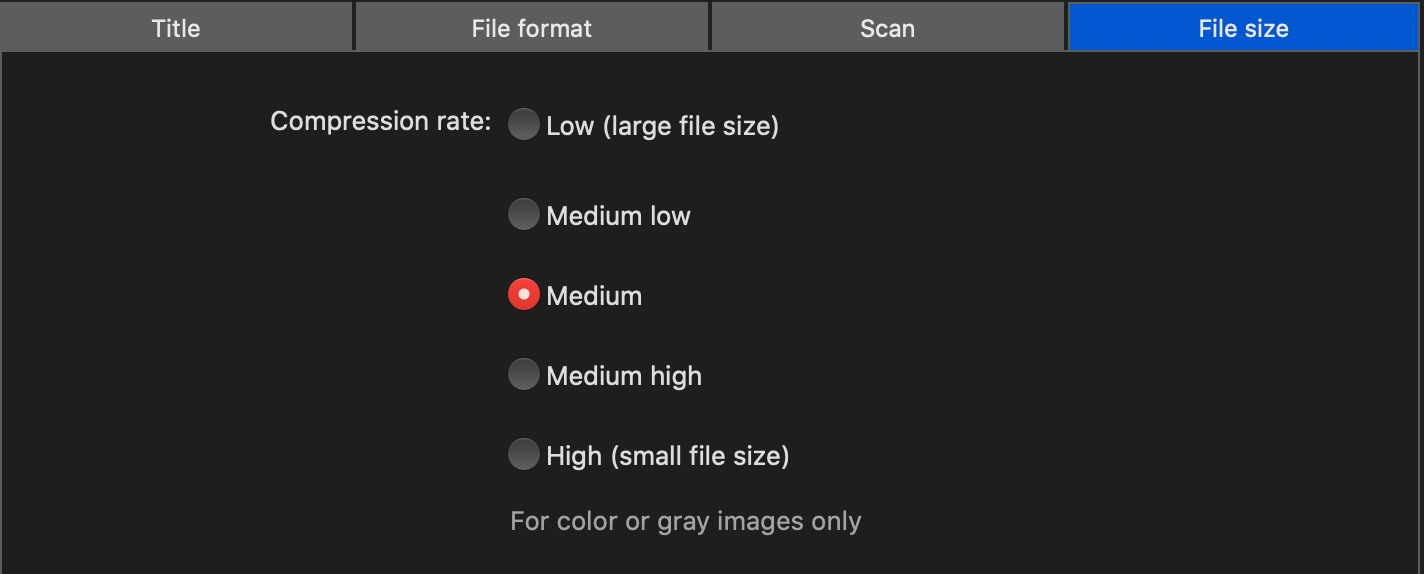
File size - change the settings for the compression rate for the files. Low compression means a higher file size and higher quality scan.