Apptoto Tools
Table of Contents
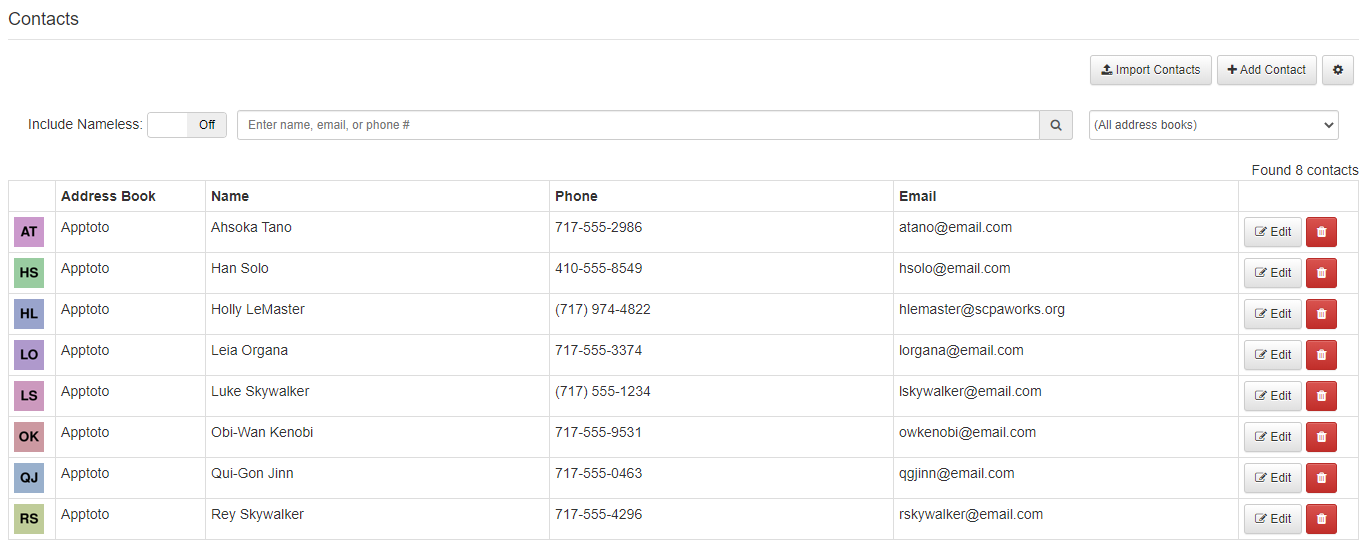
Contacts
All contacts in Apptoto can be viewed on the Contacts page under the Tools section of Apptoto. Contacts can be part of multiple calendars, such as Apptoto or Google. Contacts contained in the address book can be quickly added to appointments.
How to Add New Contacts
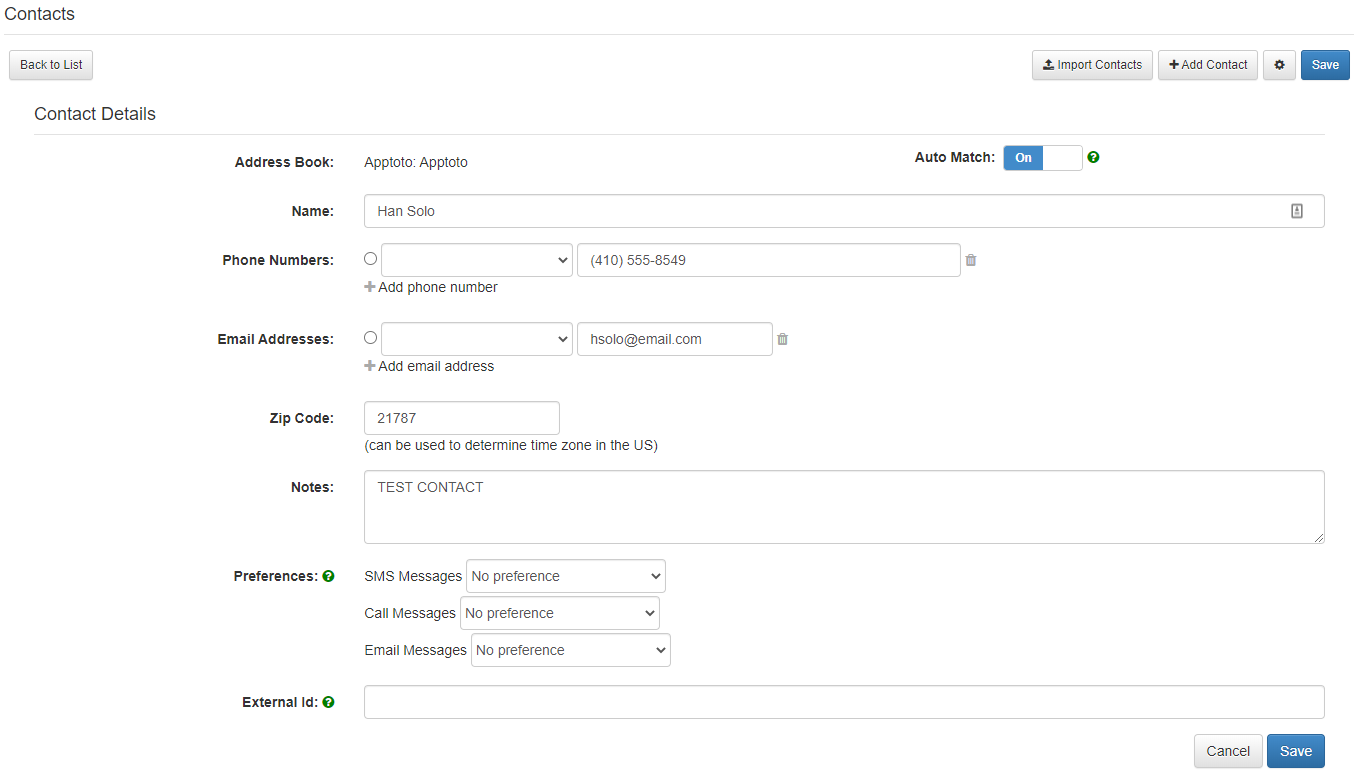
- Click the Add Contact button on the top-right of the Contacts page.
- Enter the individual’s contact information.
- Address Book - select the address book to store this contact in.
- Auto Match: - toggles whether this particular contact should be auto-populated in appointments.
- Name - the contact’s full name.
- Phone Numbers - click Add phone number and enter the contact’s phone number. Enter as many phone numbers for the contact as desired.
- *Email Addresses - click *Add email address and enter the contact’s email address. Enter as many email addresses for the contact as desired.
- ZIP Code - enter the ZIP code of the client’s primary location. This is for time zone determination.
- Notes - enter any notes about the client.
- Preferences - using the dropdown boxes, you can indicate if this contact has already opted-out of SMS, call, or email reminders.
- External Id - a unique identifier you can give the contact. Not necessary except in more advanced use-cases.
- Click Save to add the new contact to the address book.
How to Edit Existing Contacts
- Search for the desired contact using the search bar at the top of the Contacts page.
- Once the client is located, click the Edit button next to their row.
- Modify the contact’s information as needed.
- Click Save to keep your changes.
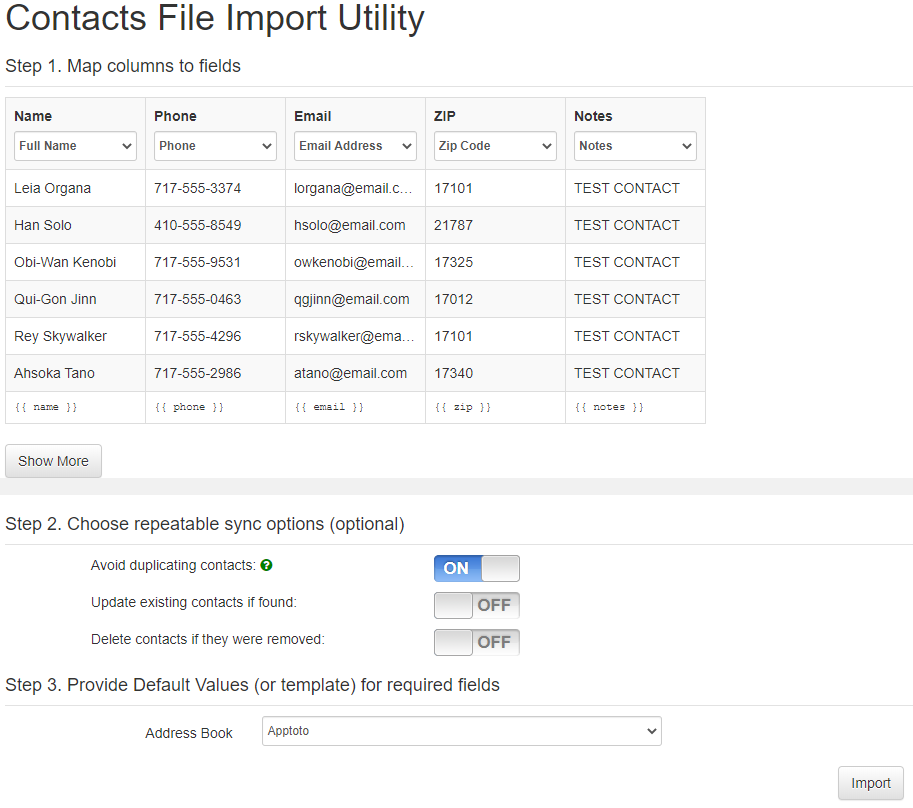
How to Bulk Import New Contacts
You can bulk import appointments from a CSV or XML file. CSV (comma-separated values) files can be created from Excel spreadsheets.
Suggested CSV Layout
| Name | Phone | ZIP | Notes | |
|---|---|---|---|---|
| Leia Organa | 717-555-3374 | lorgana@email.com | 17101 | TEST CONTACT |
| Han Solo | 410-555-8549 | hsolo@email.com | 21787 | TEST CONTACT |
| Obi-Wan Kenobi | 717-555-9531 | owkenobi@email.com | 17325 | TEST CONTACT |
| Qui-Gon Jinn | 717-555-0463 | qgjinn@email.com | 17012 | TEST CONTACT |
| Rey Skywalker | 717-555-4296 | rskywalker@email.com | 17101 | TEST CONTACT |
| Ahsoka Tano | 717-555-2986 | atano@email.com | 17340 | TEST CONTACT |
Uploading Procedure
-
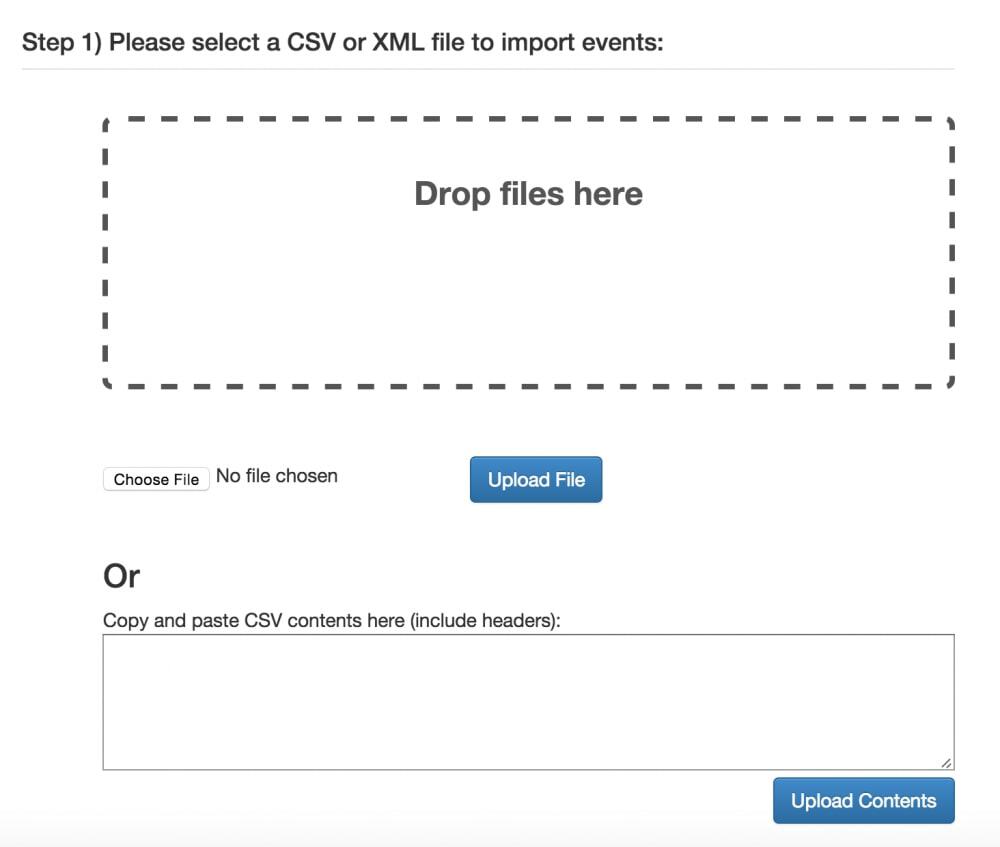
Click on the Import Contacts button at the top-right of the page.
-
You can drag and drop the CSV file into the file dropbox, or select Choose File to select the file from Windows Explorer.
- Alternatively, you can copy and paste the contents of your CSV file into the text box below the upload.
-
If you uploaded a file, click Upload File to submit your file for processing. If you pasted the contents of your CSV file, click Upload Contents instead.
-
Once Apptoto has accepted your file, you will be prompted to map CSV columns to Apptoto fields. For each column in your CSV, use the dropdown box to select the matching Apptoto field.
- i.e. for the Full Name column in your CSV, you would select Full Name in the dropdown.
- If you used the sample CSV file’s format, there should be no need to adjust the default import settings.
-
(Optional) You may be prompted to set “repeatable sync options.” If these appear, it is recommended that you use the following options:
- Avoid duplicating contacts: ON
- Update existing contacts if found: OFF
- Delete contacts if they were removed: OFF
-
Select the correct address book for this import. This is where the contacts will be stored. It is recommended that you use the Apptoto address book.
-
Click Import to begin importing your contact list.
-
You will see the following screen if the import has completed successfully. If the upload does not succeed, you will see an error message. Read the message to determine the issue, fix it, and then restart the upload process to try again. Alternatively, if only some rows have issues, you can choose to skip uploading just those rows.
-
Should you need to, you have the option to undo a successful import by clicking Undo Import.

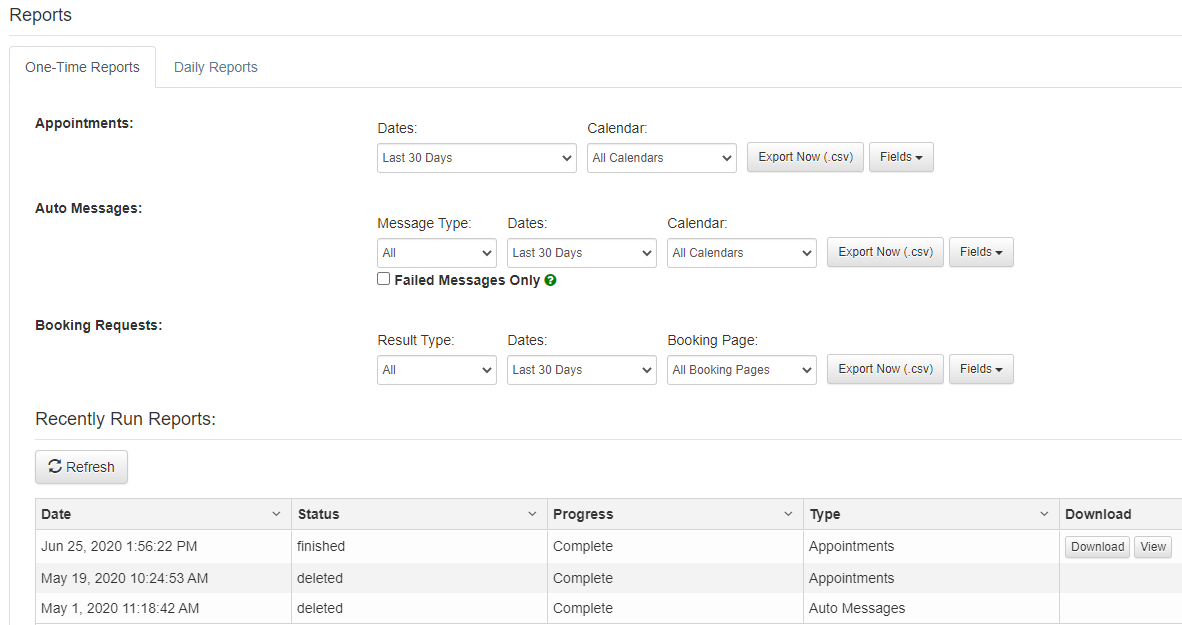
Charts and Reports
You can get an overview of appointment activity with the charts and reports provided by Apptoto.
Charts
Charts provide a visual representation of message and appointment activity over a certain time period.
There are two chart tabs: Messages, which displays information about outgoing and incoming messages, and Appointments, which displays information about appointments.
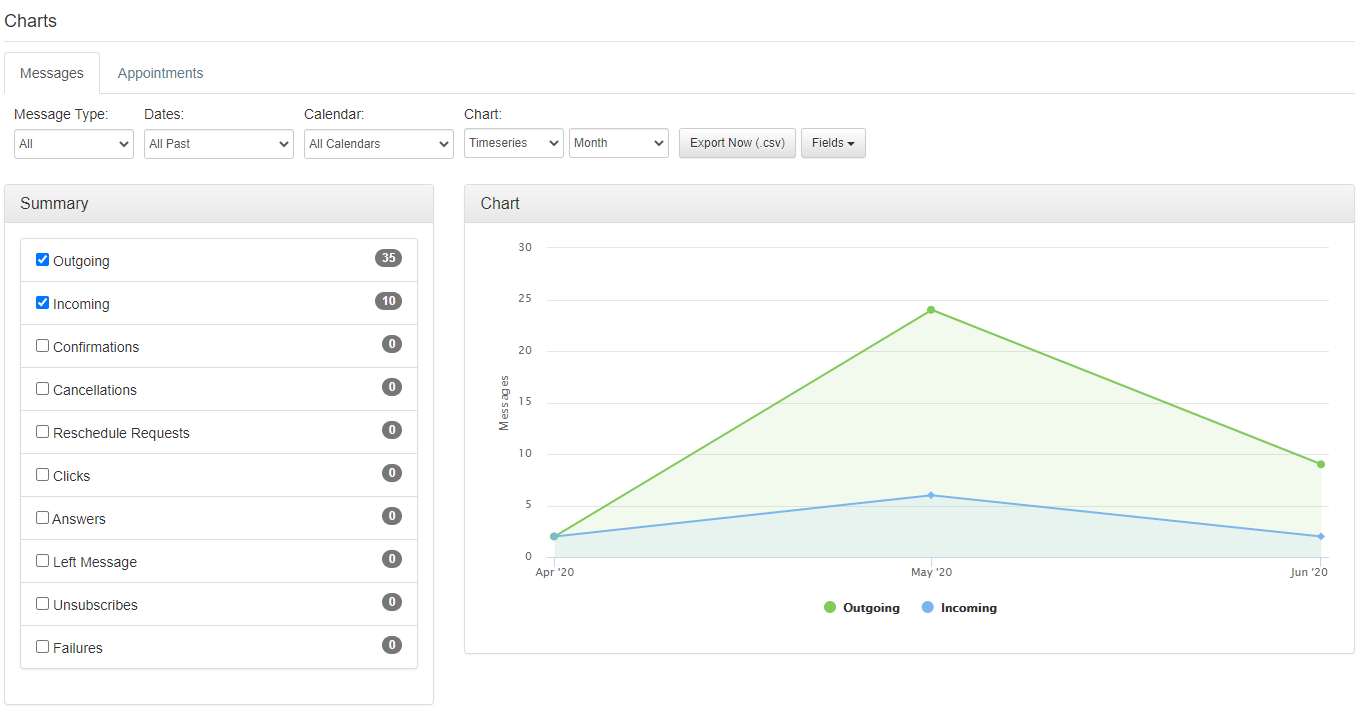
You can use the dropdown menus above the chart to adjust parameters, such as time period, calendar, and message type. You can adjust the type of chart with the Chart dropdown. Appointments can be filtered using Rules, if desired.
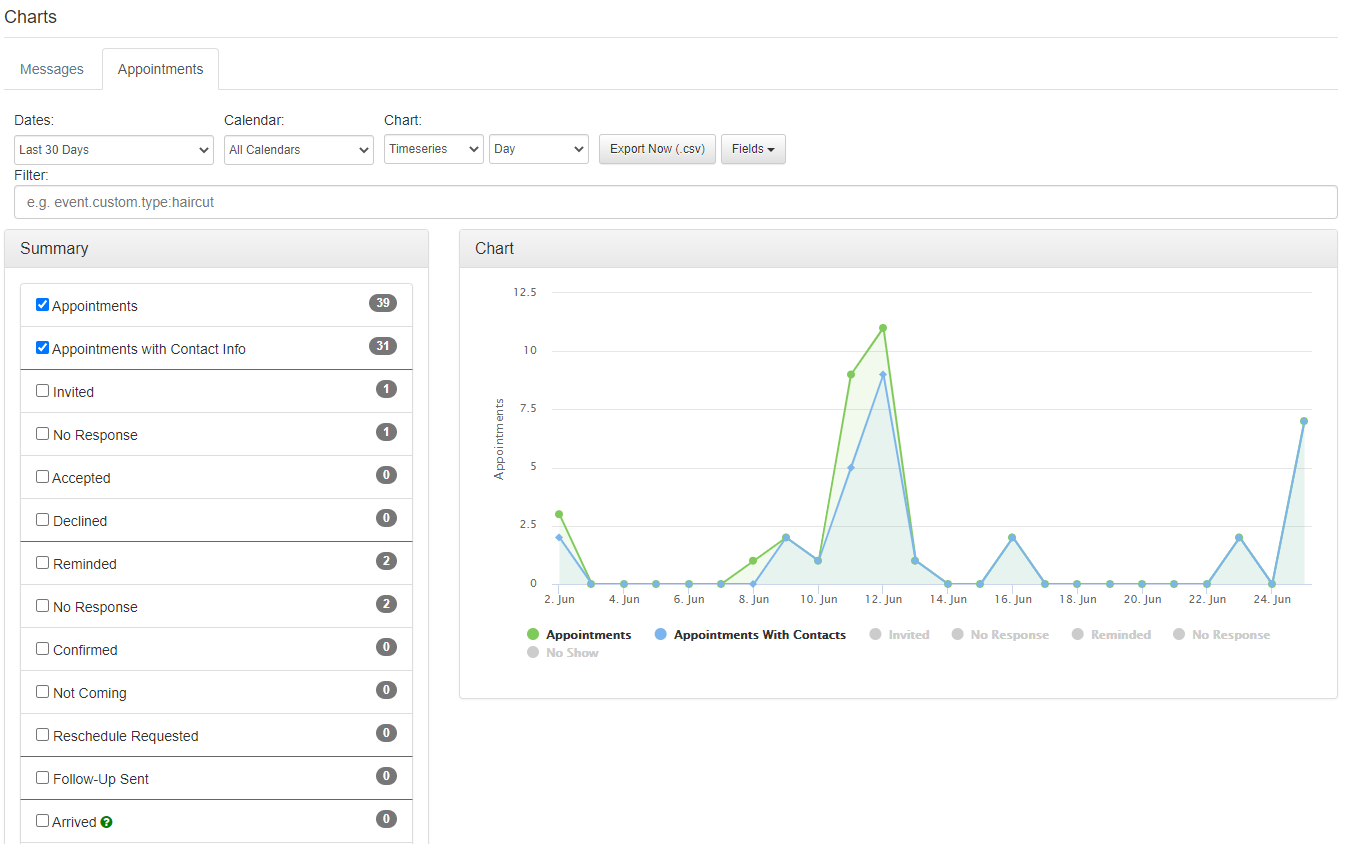
Data points can be toggled on and off under the Summary list.
Generated charts can be exported to CSV at any time with the Export Now (.csv) button.
Reports
Two tabs are available on the Reports page. The first, One-Time Reports, allows generation of CSV reports with custom parameters. The second, Daily Reports, allows adjusting of daily report email settings.
Generating a Report
- Select the category of report you want to generate (Appointments, Auto Messages, or Booking Requests).
- Using the dropdown boxes, select the options for data in your report.
- With the Fields dropdown box, select the data fields you want included in your report.
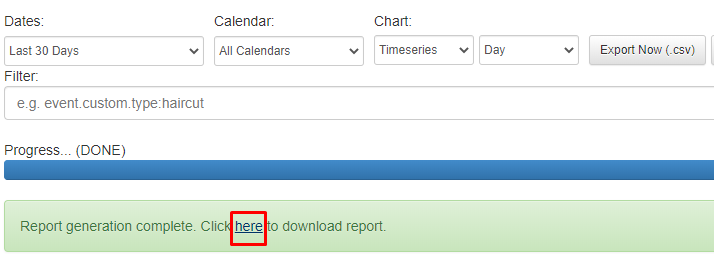
- Click Export Now to begin generating your report.
- Under the Recently Run Reports section, locate the report you generated.
- When the Status reads finished, click Download to save your report to your computer. Note that reports after a certain time period are deleted. You can also quickly view your report with the View button.
- You may need to click the Refresh button to update the status of your report.
Adjusting Daily Report Settings
Daily reports are emails that are sent to specific recipients about daily activity in Apptoto.
- Click the Daily Reports tab.
- Under each report category (Daily Report, No-Show Report, and Booking Requests Report), select the desired options for report delivery and recipients. If you leave the boxes unchecked, these reports will not be sent out.
- Under the Report Recipients section, you can adjust options for who you want to send all reports to.
Consent
The Consent section allows you to blacklist email addresses and phone numbers from receiving reminders/informational or marketing messages.
Under the Stoplists tab, you can view users who have opted-out of Apptoto messages. This is done when a client responds with “STOP”, “END”, “QUIT”, or “UNSUBSCRIBE” to an Auto Message. You cannot add clients manually to the Stoplist.
Adding Someone to a Consent List
- Select the consent category you’d like to block
- Reminders/Informational - appointment reminders and information messages
- Marketing - marketing campaign messages
- In the communication method boxes, add the client’s contact information. Each entry should be on its own line.
- Click Save to save the contents of your list.

Export the Stoplist
- Click the Stoplists tab.
- Click Export under the Stoplist you want to save.
- Go to the Reports tool tab on the left.
- Under Recently Read Reports, click refresh. Your report should appear with the type Email/Phone Stoplist.
- Once the report has finished running, click Download to save it.

Log
With the log, you can see all SMS messages, emails, or phone calls that have been sent out by Apptoto. These can be filtered by date or phone number/email address.
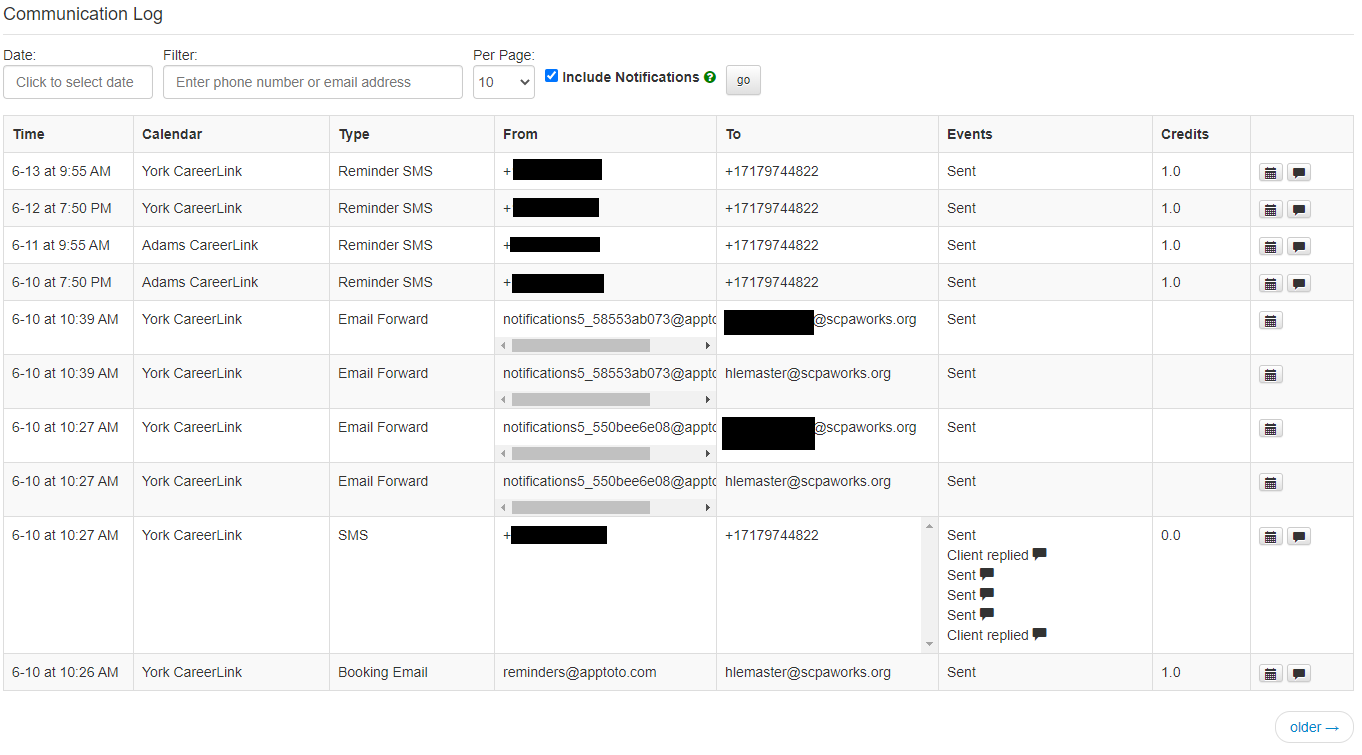
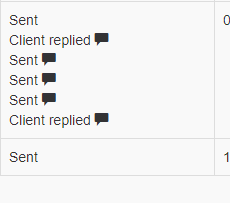
You can see the exact messages that have been sent by clicking the Show Messages button. The relevant event can be viewed with the Show Event button.
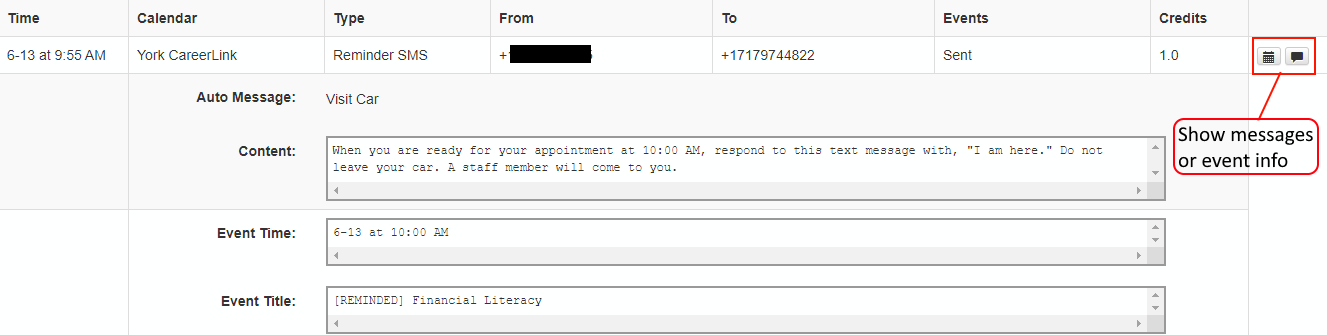
You can view the exact content of sent messages by highlighting over the message icon. A tooltip will appear with the text of the message.