Triage Intake Process
Contents
Process Diagram
Apptoto Scheduling Steps
There are two primary scheduling methods:
- Calendar view scheduling - book the appointment the traditional way through the Apptoto calendar interface
- Booking/availability page scheduling - book the appointment through a specific intake navigator’s availability page
Method 1: Calendar View Scheduling
Advantages:
- Can select from any intake navigator in the system when scheduling
- Allows rapid appointment scheduling & viewing of all scheduled appointments quickly
Disadvantages:
- Must know the availability of each intake navigator beforehand
Steps:
-
Log into the Apptoto portal. You will be automatically redirected to the Appointment Calendar view.
-
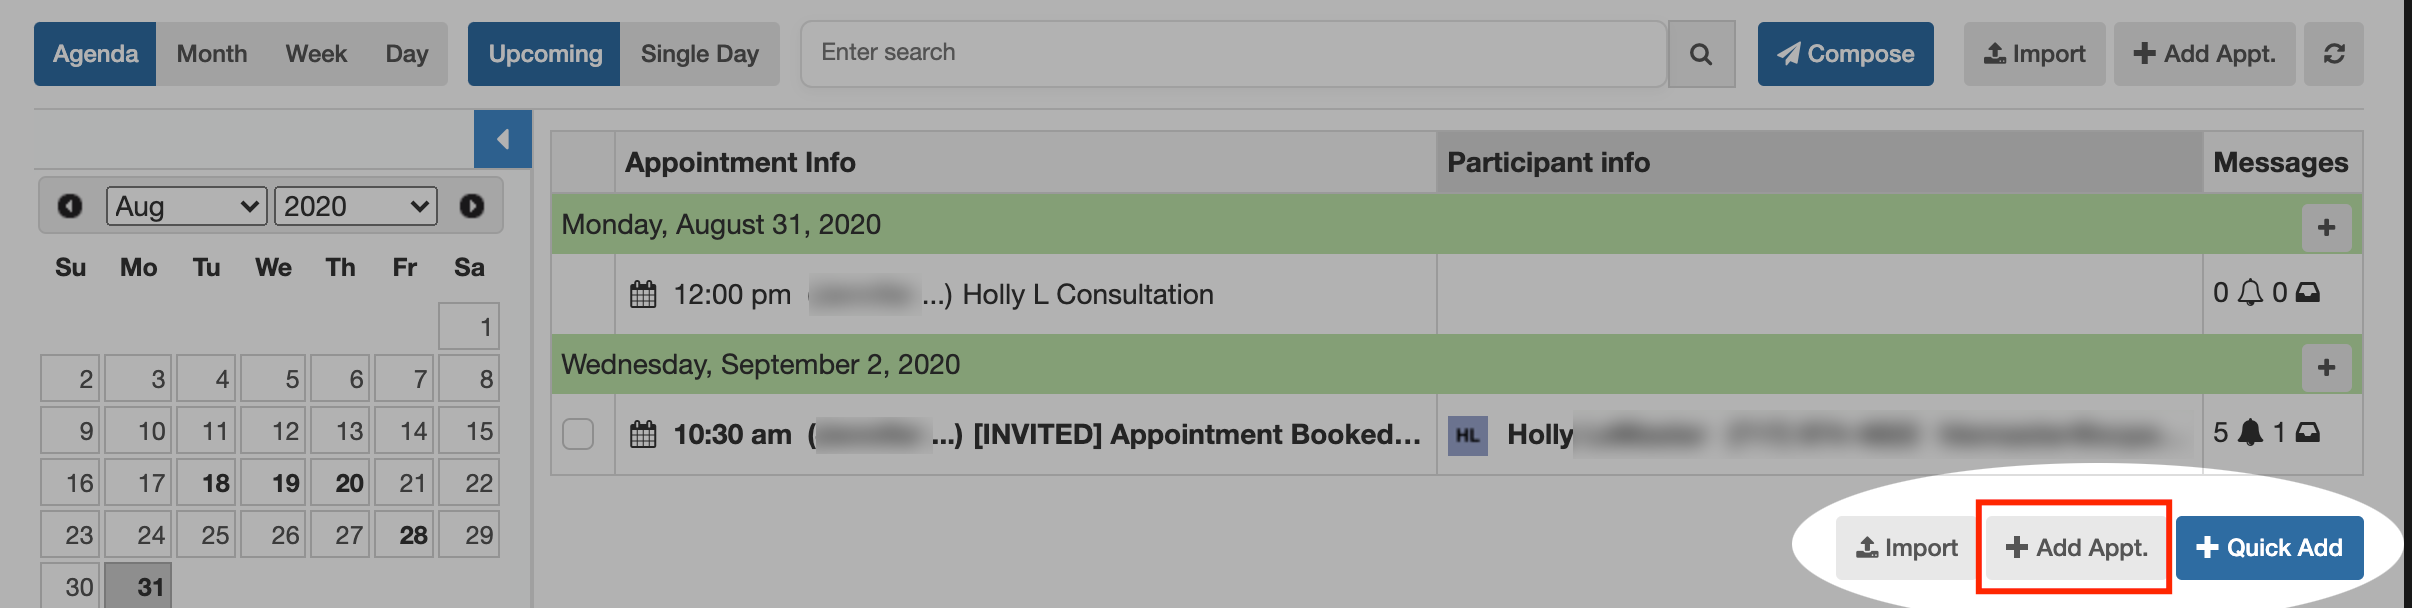
Click +Add Appt
-
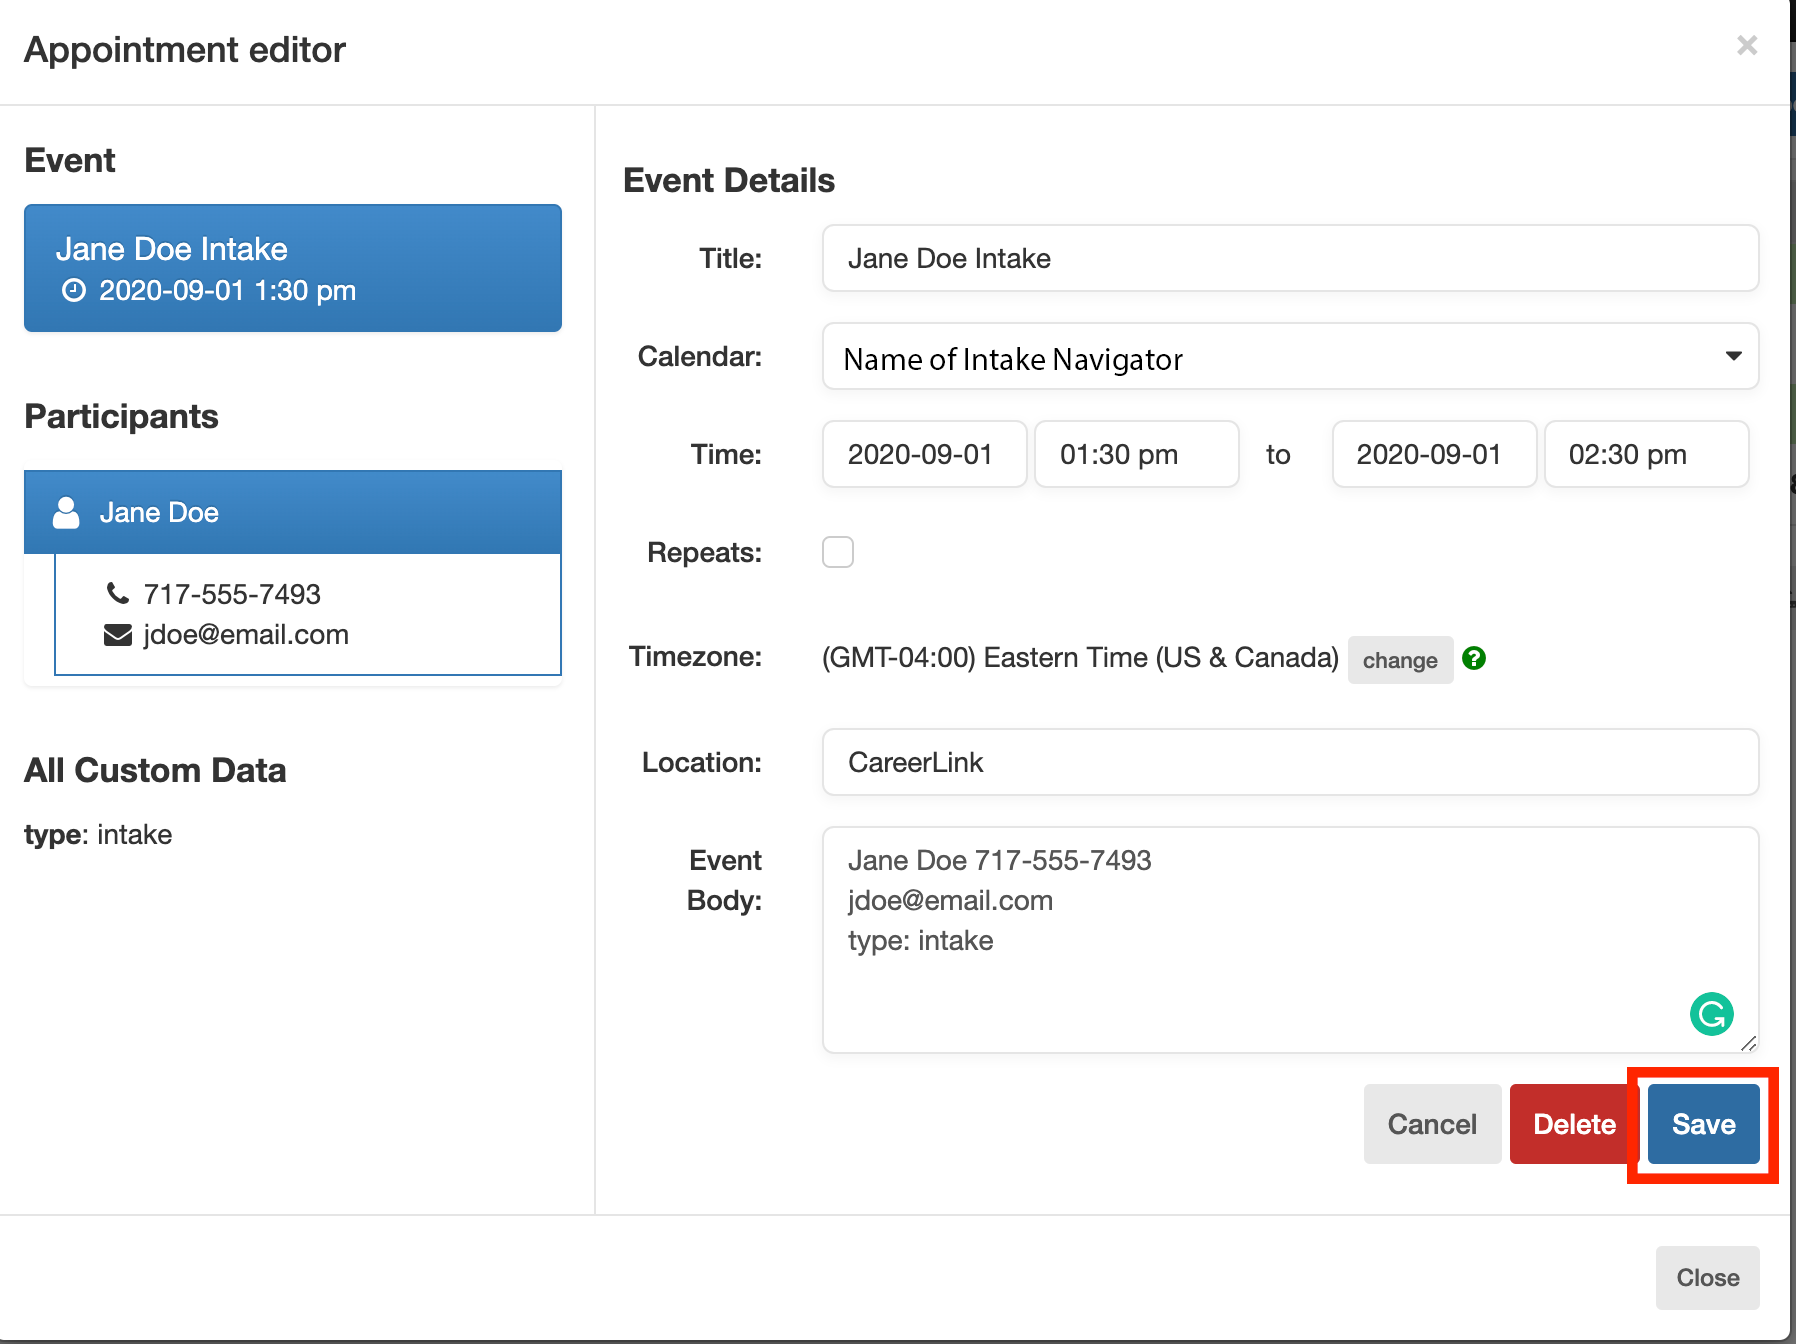
Enter the appointment details in the fields. You can add the participant information to the event body to save time, and it will be automatically populated to the correct field. Click Save to keep your changes.
-
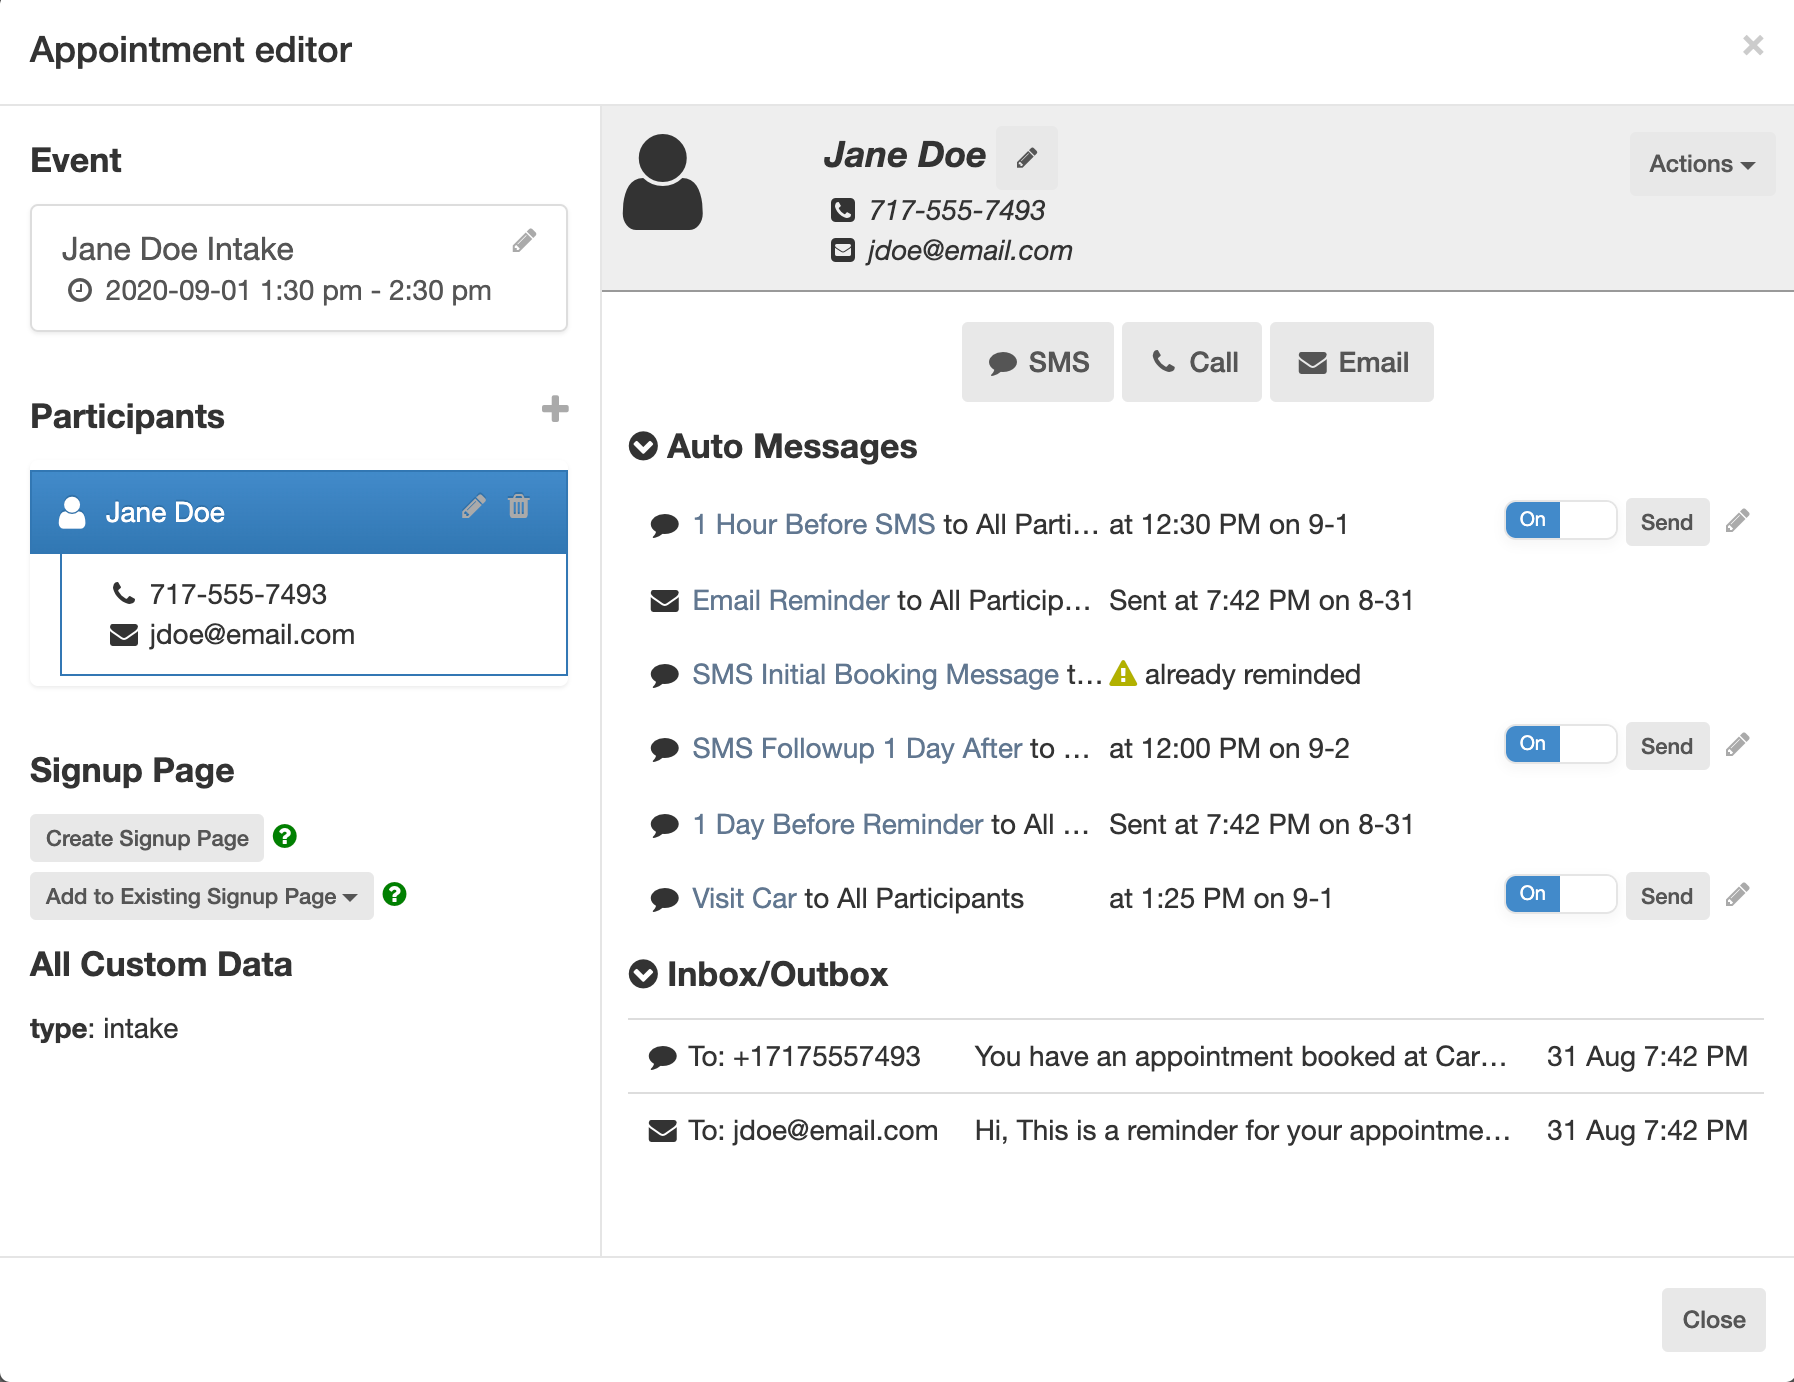
The event details and participant summary will show once you click Save. Review these details for accuracy, and then click Close to close the dialog. The appointment will appear in the calendar.
-
The appointment is booked and the participant will receive scheduled reminders!
Method 2: Booking/Availability Page Scheduling
Advantages:
- Quickly see the availability of intake navigators in a visual format
- Easy to schedule appointments for a single intake navigator
Disadvantages:
- Can only see one intake navigator’s page at a time
- Participant must do mobile authentication where they are texted a one-time code that must be entered into the system (this can be skipped if the participant does not have a cellphone)
Steps:
-
Open the URL of the intake navigator’s availability page for which you are scheduling. Example URL:
intake_johnsmith.apptoto.com-
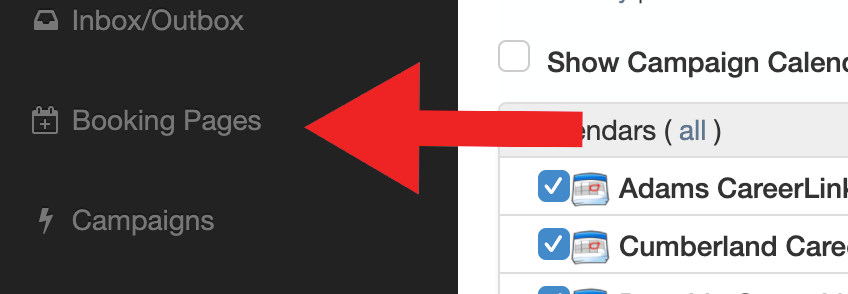
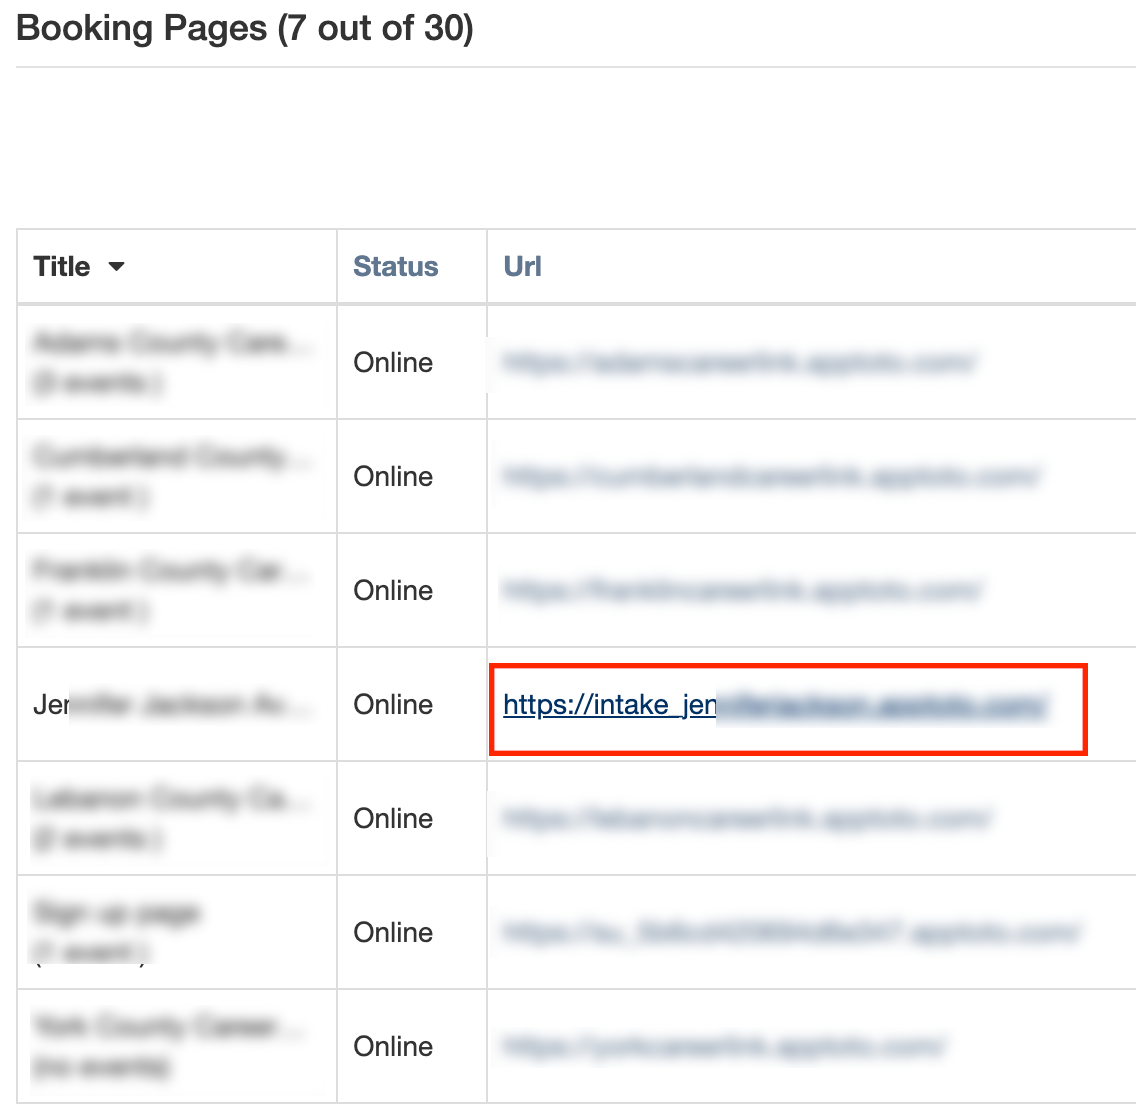
To find the URLs of all availability pages, click Booking Pages in the Apptoto main navigation to the left.
-
You can open an availability page from the Booking Pages area by clicking its URL in the list.
-
-
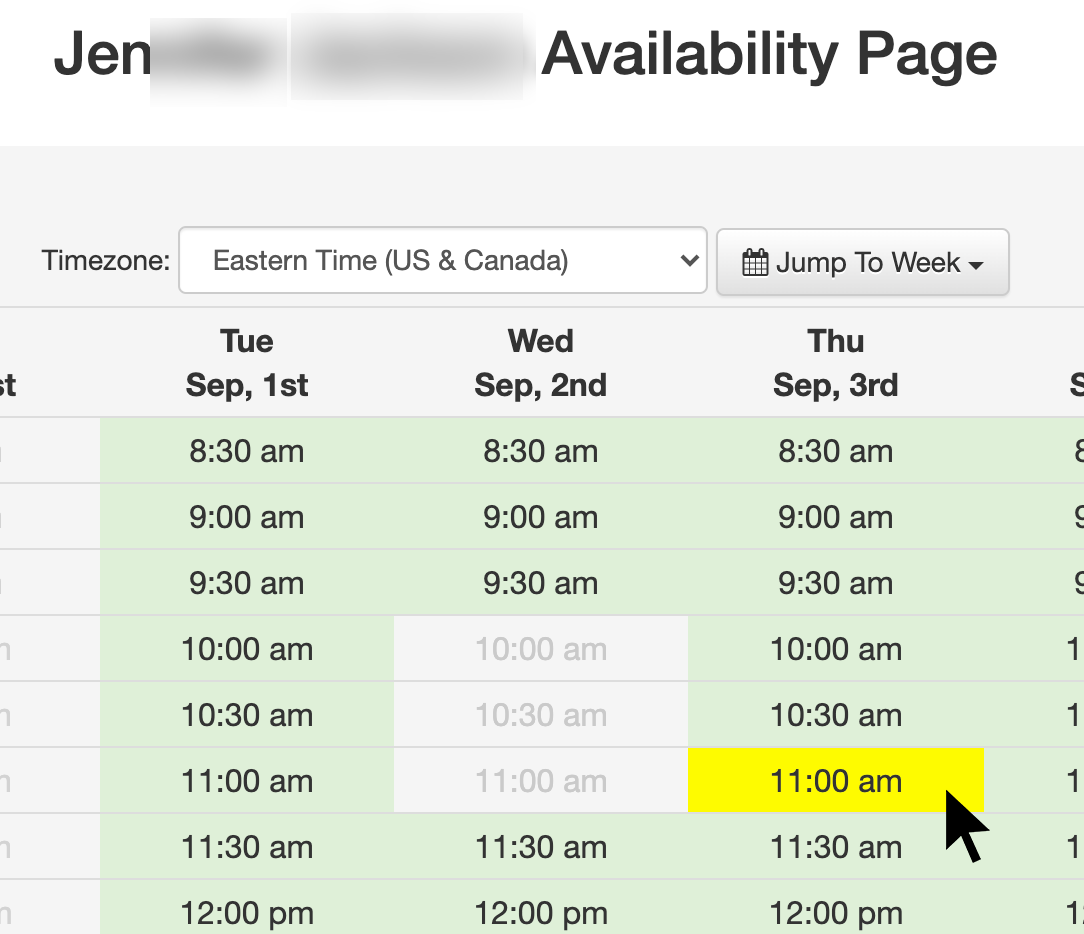
Click a time that is available for the intake navigator and works for the participant. Available times are shown in green, while unavailabile times are shown in gray.
-
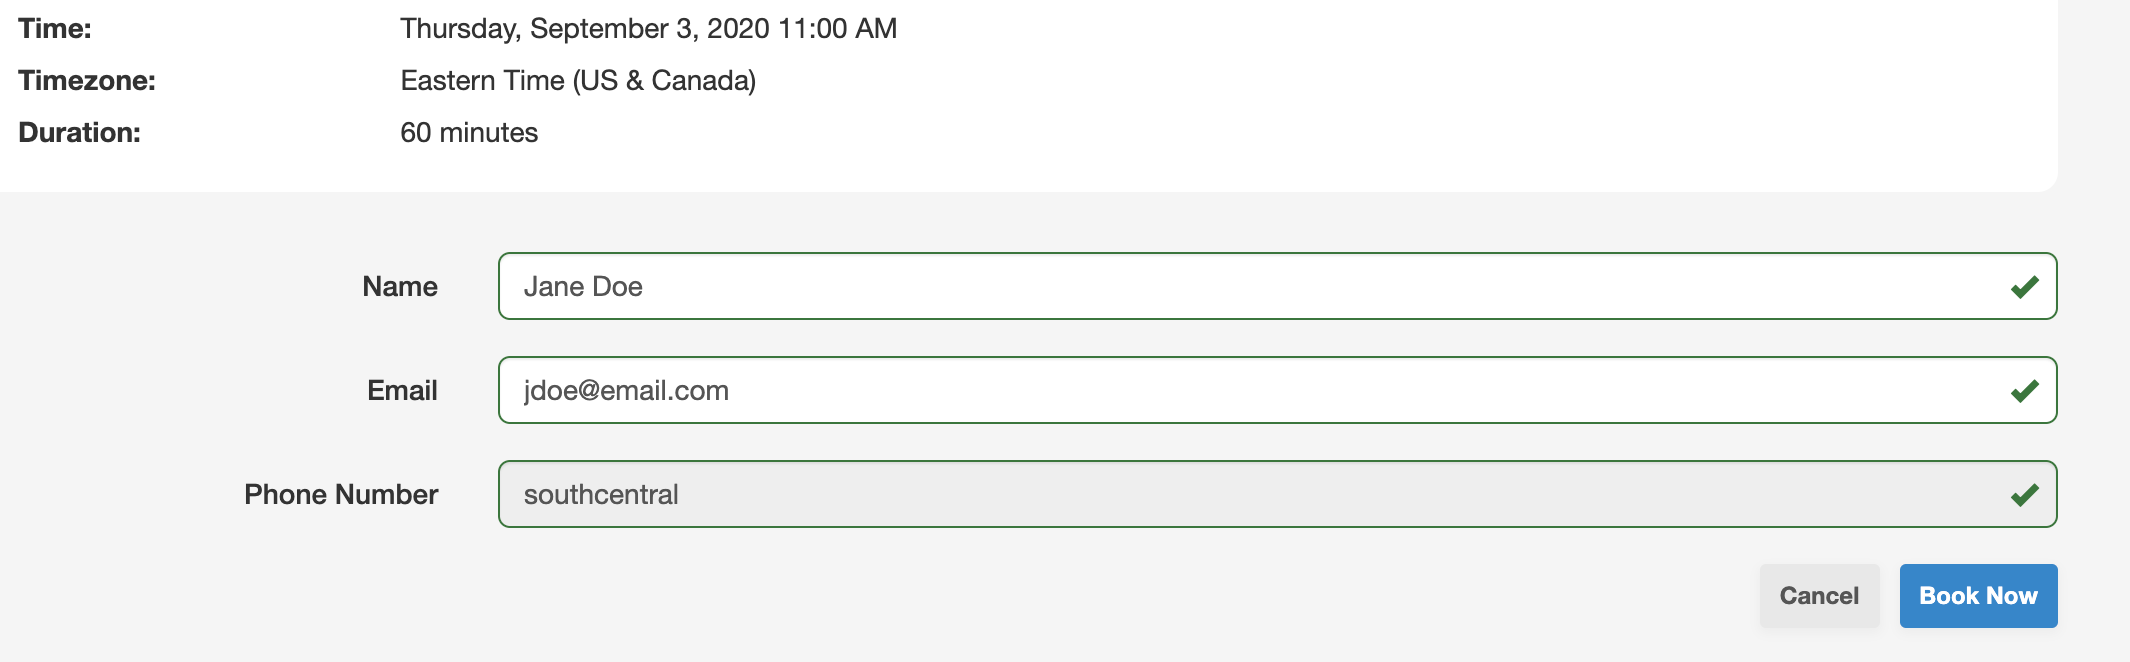
Enter the participant’s phone number. If the participant does NOT have a cellphone, type “southcentral” to bypass phone authentication.
-
Enter the participant’s name and email address into the fields. Review the appointment details at the top, and click Book Now to save the appointment.
-
The appointment summary page will appear. You can choose to reschedule or cancel the appointment from this page. If you are satisfied, click the back button on your browser twice to return to the availability page.
Intake Process Video
Setting Intake Navigator Availability
-
Click Booking Pages on the left-hand navigation menu.

-
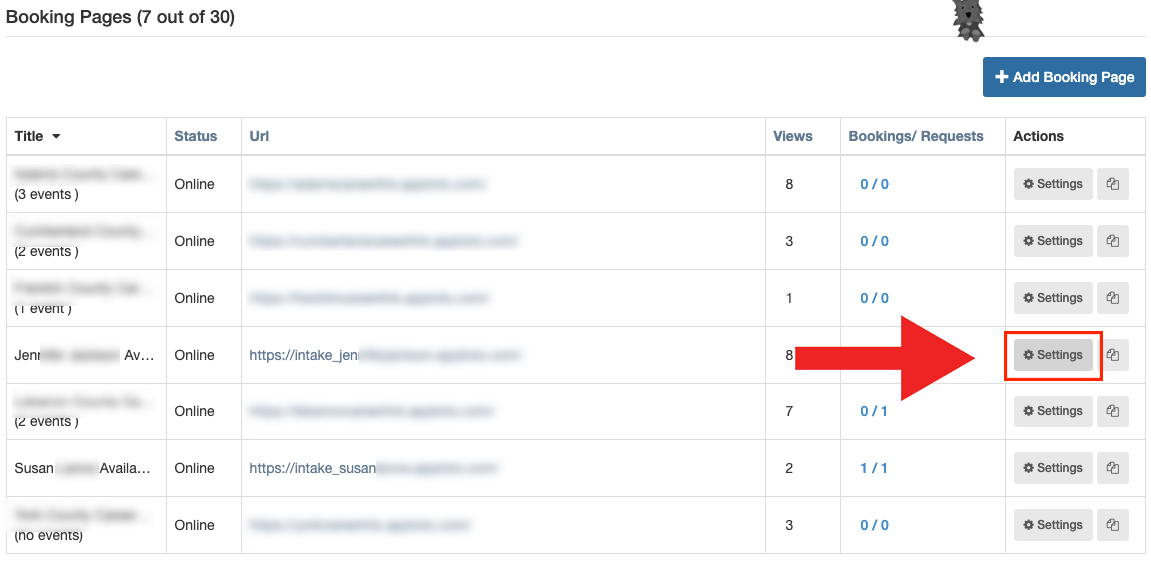
Find the booking page that corresponds to the intake navigator you are setting availability for. The URL always follows the same format:
https://intake_NavigatorName.apptoto.com -
Click the Settings button in the Actions column for the intake navigator’s availability page. You will be taken to the Booking Page Details page.
-
Click Availability in the toolbar directly under the “Booking Page Details: intake_…” heading.
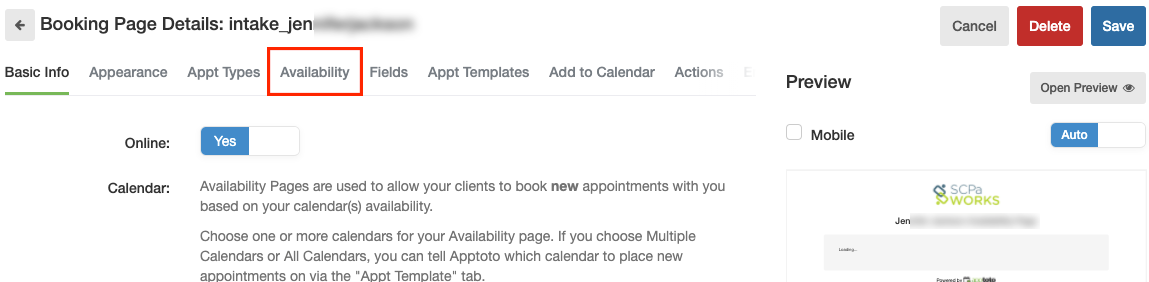
-
There are two sections to the availability settings. The first (shown below) allows setting available times and filtering events.
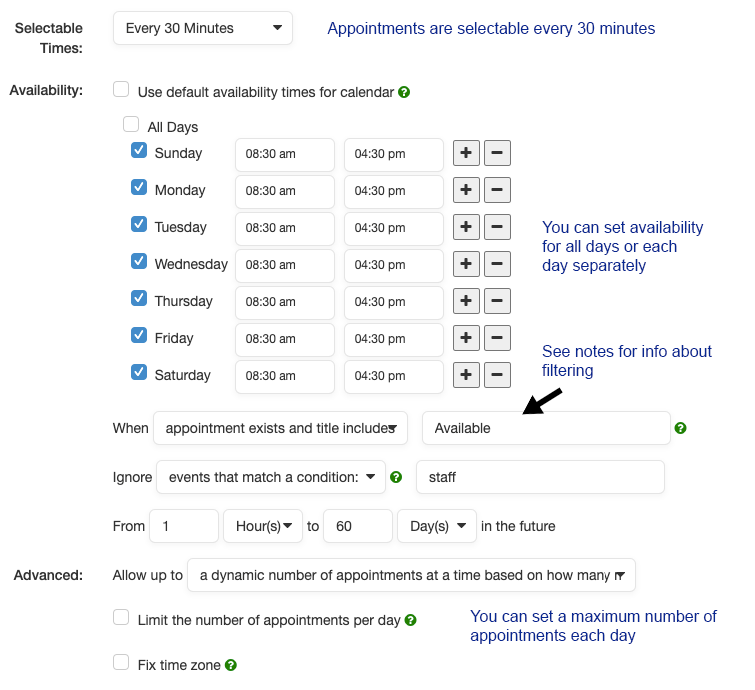
You can use the fields at the bottom (“When” and “Ignore”) to filter which events on your calendar count as busy. For example, if you have a weekly appointment called “Staff Meeting” you don’t want to appear busy during, you can type “staff meeting” into the “Ignore” field.
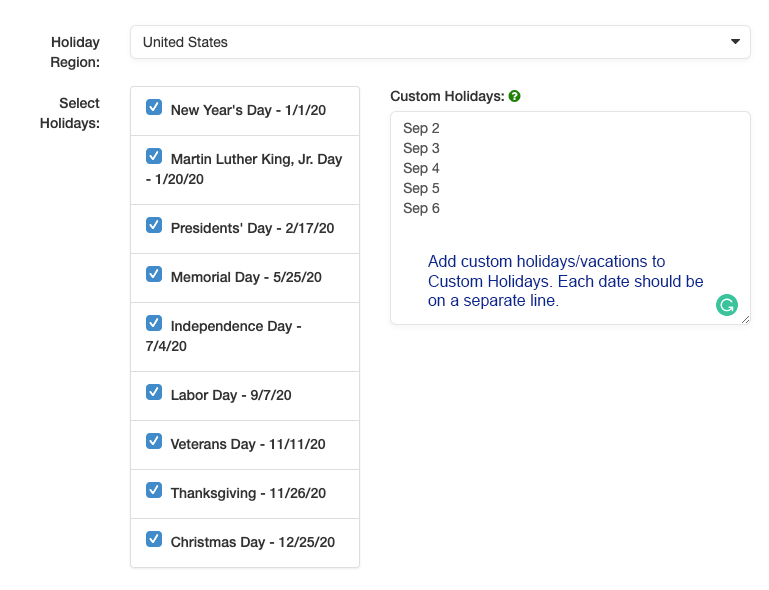
-
The second section allows setting holidays. Any days specified will have no available appointment slots.
-
Once you are done setting availability, click Save to save your changes.