Admin Dashboard Overview
Table of Contents
- How to Access the Site Dashboard
- Dashboard User Interface
- Program View Modes
- Program Actions
- Filter Programs by Status
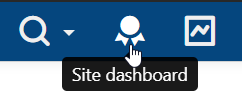
How to Access the Site Dashboard
After logging in you will be automatically directed to the site dashboard. You can easily return to the site dashboard by:
- Click the Site Name or Awards Ribbon icon.

Dashboard User Interface
Each primary feature of the dashboard interface is numbered in the following image. See the list below for a description of each feature.
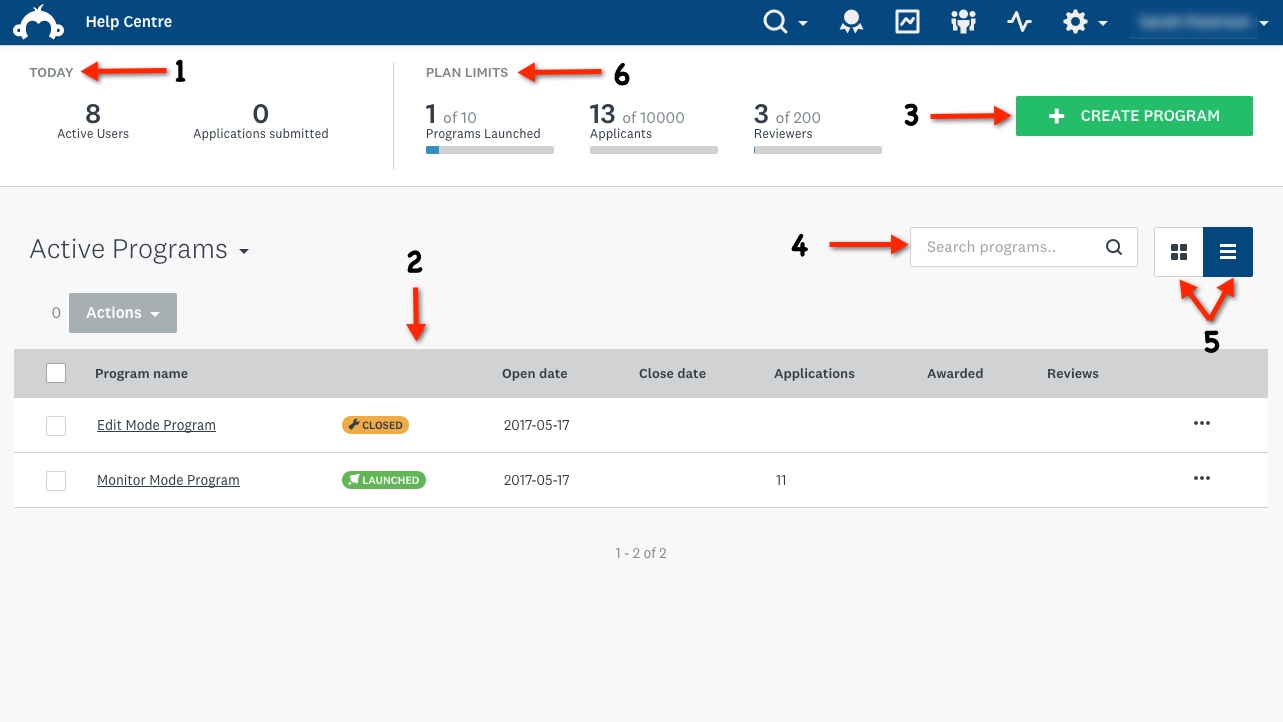
| Feature | Description |
|---|---|
| 1 Today | Provides an overview of the current day's:
|
| 2 Program Details | Displays a list of each program, plus relevant details. |
| 3 Create Program Button | Create a new program. |
| 4 Search Bar | Allows searching for a specific program. |
| 5 Grid View/List View Toggle | Toggle between list and grid view for your programs. |
| 6 Plan Limits | Displays the limits of the SMApply subscription plan. The subscription plan determines the number of launched programs and total applicants you can have. |
Program View Modes
There are two modes for displaying your site’s programs, described in detail below.
How to Switch Between Views
-
Locate the Toggle View button in the top-right corner.
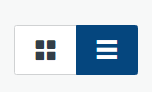
-
Select the view mode you desire by clicking its icon. List view can be turned on with the icon with three horizontal lines, and grid mode is enabled with the icon with four squares.
Tile View
There are two distinct tile types in Tile View.
- Program Tile in Build Mode
- Program Tile in Monitor Mode
Program tiles appear in Build Mode when they have not yet been launched. Once they have been launched, they appear in Monitor Mode.
Build Mode
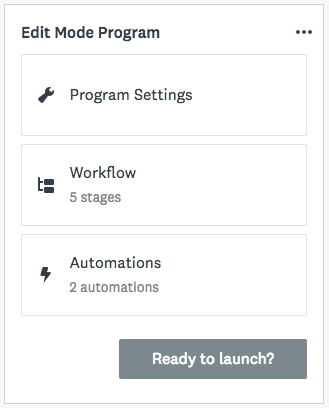
Let’s go over each part of the tile pictured above:
- Program Settings - quickly access the settings page for the selected program. This also displays text if the program is hidden from public view.
- Workflow - access the workflow settings of the selected program. This also displays how many stages are in the program.
- Automations - Easily access the program automation settings. This also displays how many automations are setup within the program.
Monitor Mode
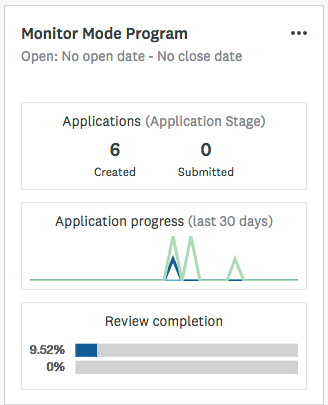
Let’s go over each part of the tile pictured above:
- Applications - Quickly navigate to the Program Dashboard. This also provides a quick view of created and submitted applications within the program.
- Application Progress (last 30 days) - Quickly access the Applications page for this program. This also displays a graph of application activity in the past 30 days. The green line represents applications created, and the blue line represents applications that have been submitted.
- Review Completion - Quickly access the Reivew page for this program. Also displays the percentage of completed reviews for the program. Each bar represents a different review stage.
List View

List view displays all programs in a table. Details about each program can be viewed to the left under the information columns. Each column and its purpose is described briefly below.
- Selection Checkbox - you can click the checkbox in this column to select the corresponding program. Multiple programs can be selected at once using this method. Bulk actions can be performed with selected programs.
- Program Name - the display name of a program.
- Program Status - the status of a program, usually either Closed or Launched.
- Open Date - the date when the program opens to applications.
- Close Date - the last day when applicants will be able to complete tasks within the program.
- Applications - how many active applications have been created within the program.
- Awarded - the number of applications that have been awarded.
- Reviews - the number of reviews that have been completed for the program.
- … (More Options) - this is a context menu. Opening it will allow you to perform more actions on the selected program.
Program Actions
Actions can be performed on programs, such as duplicating, deleting, and exporting. You can either perform bulk actions (on many programs) or individual actions (on a single program).
Please note that actions can take time to complete. For instance, if you choose to duplicate a program, you may need to wait up to 5 minutes to see the copy program. Do not click action buttons multiple times or multiple actions will be performed!
Performing Actions on Multiple Programs
- Select the programs you wish to perform actions on by using the checkbox column to the left of the program’s name.
- Click the Actions button to see the available actions to perform.
- Click the action you wish to perform.
Below is a brief description of each action:
- Duplicate - creates an exact copy of the selected program(s).
- Move to Trash - delete unwanted program(s).
- Export - export program(s) to external files.
Performing Actions on Individual Programs
- Enter list view mode, if not already enabled.
- Click the context menu (… in right-most column) to see available actions.
- Click the action you want to perform.
Below is a brief description of each action:
- Launch - launch (publish) the program.
- Workflow/View Dashboard - this action will display as Workflow if the program is in Build Mode, and as View Dashboard if the program is in Monitor Mode. Workflow will allow you to see the workflow settings for the program, while View Dashboard will allow quickly viewing the program’s monitoring dashboard.
- Export - export details about the program.
- Duplicate - create a copy of the program.
- Move to Trash - delete the program.
Filter Programs by Status
-
The filter selection is in the top left corner of the dashboard.
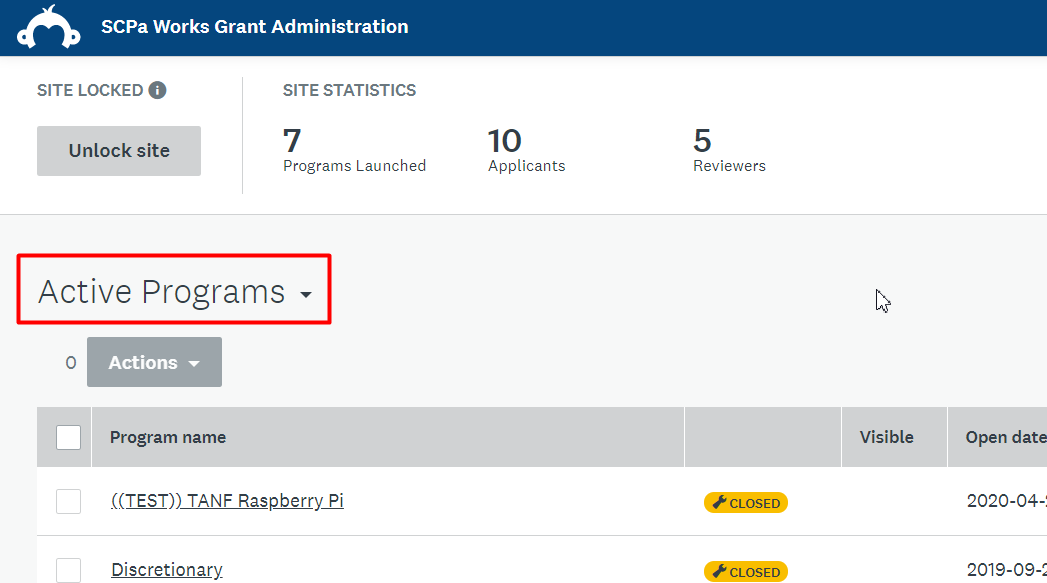
-
Click the filter selection to open the menu. Select the program status by which you want to filter.
-
The programs will be sorted by their statuses.
Status Descriptions
- Active Programs - All programs not in the Trash
- Launched - Programs that have been published (monitor mode)
- Not Yet Launched - Programs that have not been published
- Trashed - Programs that have been deleted